Little Brother/Little Sister Security Blanket
Hook this beautiful security blanket for a kiddo in need of warmth and comfort.

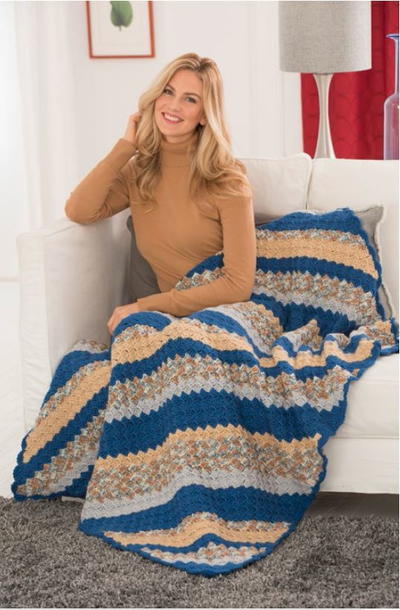
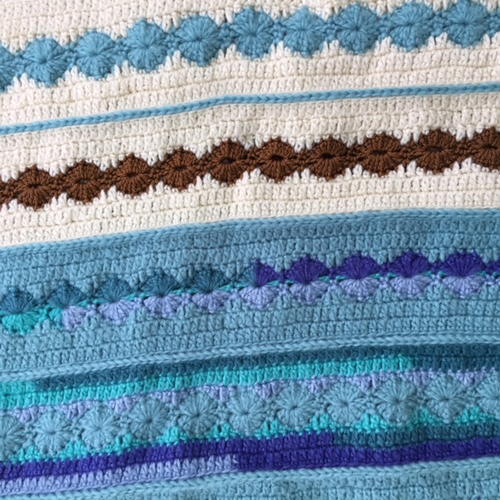
If you're looking for the perfect security blanket pattern to hook for a special little person in your life, look no further than the Little Brother/Little Sister Security Blanket. This stunning yet easy mile-a-minute pattern boasts movement and whimsy thanks to the Catherine Wheel stitch and the beautiful brain of its designer, Marie Segares. Marie created this original blanket pattern for AFCAP's 2018 Security Blankets Charity Drive, and we hope you hook it in good health for kids who are struggling to recover theirs. A blanket as quick and easy to hook, and as lovely and filled with compassion as this one will leap off your hook and into the arms of a grateful child in need.
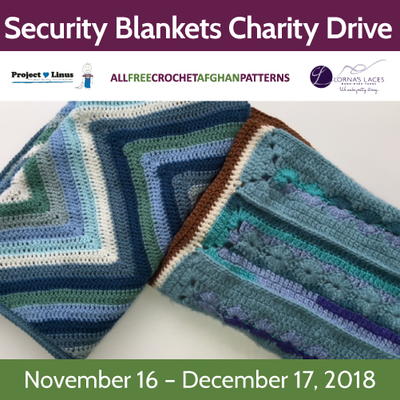
CLICK HERE for details on our 2018 Security Blankets Charity Drive!

Crochet HookI/9 or 5.5 mm hook, J/10 or 6 mm hook, K/10.5 or 6.5 mm hook
Yarn Weight(4) Medium Weight/Worsted Weight and Aran (16-20 stitches to 4 inches)
Crochet Gauge12 dc = 4” (10 cm) across. Exact gauge is not critical for this project.
Finished SizeBaby Blanket: 43” (109 cm) wide x 34” (86.5 cm) long.
Materials List
- Red Heart Dreamy yarn (100% acrylic, 8.8 oz/250 g, 466 yd/425 m/medium weight) – 1 skein each in 8512 Aqua (CA) and 8311 Ivory (CC), or approximately 466 yd (425 m) in each of 2 colors in any medium weight yarn.
- Red Heart Dreamy Stripes yarn (100% acrylic, 6.3 oz/180 g, 355 yd/325 m/medium weight) – 1 skein in 9381 Caribbean (CB), or approximately 325 yd (297 m) in any medium weight yarn.
- Red Heart Soft yarn (100% acrylic, 5 oz/141 g, 256 yd/234 m/medium weight) – 1 skein in 1882 Toast (CD), or approximately 230 yd (210.5 m) in any medium weight yarn.
- Yarn Needle
- Stitch Markers
INSTRUCTIONS
Abbreviations Used in This Pattern:
BL – back loop only – Marly Bird has a helpful video for identifying the back loop here.
CA – Color A
CB – Color B
CC – Color C
CD – Color D
ch – chain
dc – double crochet
hdc – half double crochet
rep – repeat
Rnd(s) – Round(s)
sc – single crochet
sl st – slip stitch
sp – space
st(s) – stitch(es)
tr – treble (triple) crochet
*+Repeat instructions after asterisk or plus sign as indicated.
() Repeat instructions between parentheses into same stitch or space.
[] Repeat instructions between brackets as indicated.
Pattern Notes:
- This pattern uses U.S. crochet abbreviations.
- Entire blanket is worked in the round with the right (front) side facing up.
- A helpful tutorial for making a single crochet seam is available here.
- Ch 1 at beginning of Rnds does not count as a stitch.
- Joining single crochet stitches in Rnds 2-4 of Strips and Border Rnds 1-4 count as last chain of chain space.
Pattern Directions
-
Strips
Make:
• 3 with CB as first color and CA as second color,
• 2 with CA as first color and CB as second color,
• 2 with CA as first color and CC as second color, and
• 2 with CD as first color and CC as second color.
With first color, ch 86 (or any multiple of 6 sts, + 2).
Rnd 1: Skip 1 ch, sc in next ch, *skip 2 ch, 7 dc in next ch, skip 2 ch, sc in next ch;** rep from * across row, ch 2, place marker in ch-2 sp, turn to work on opposite side of foundation chain, sc in first st, rep from * to ** across foundation chain, ch 2, place marker in ch-2 sp, fasten off first color, join second color with sl st to first sc.
Rnd 2: Ch 4 (counts as tr), *dc in next st, hdc in next st, sc in next st, skip 1 st, sc in next st, hdc in next st, dc in next st,+ skip 1 st; rep from * to + across to last st before marker, tr in next st, ch 3, 3 dc in marked ch-2 sp, remove marker,** ch 3, tr in next st, rep from * to ** across, ch 2, join with sc to top of first ch 4.
Rnd 3: Ch 1, 3 dc in same ch-3 sp, *dc in each st across to ch-3 sp, (3 dc, ch 3, 3 dc) in ch-3 sp, dc in next st, skip next st, dc in next st,** (3 dc, ch 3, 3 dc) in ch-3 sp; rep from * to ** across to last ch-3 sp, (3 dc, ch 2, join with sc to first dc) in ch-3 sp.
Rnd 4: Ch 1, 2 dc in same ch-3 sp, *dc in each st across to ch-3 sp, (2 dc, ch 2, 2 dc) in ch-3 sp, dc in next 8 sts,** (2 dc, ch 2, 2 dc) in ch-3 sp; rep from * to **, (2 dc, ch 1, join with sc to first dc) in ch-3 sp. Fasten off second color. -
Assemble Strips
Assemble Strips with single crochet join (see Pattern Notes) in the order indicated in assembly diagram as follows: With wrong sides together, join CA with sl st in corner ch-2 sp, working through both strips on right sides of strips, ch 1, sc in ch-2 sp, sc in center loops on of each st across row, sc in ch-2 sp, fasten off. Repeat until all Strips are joined. -
Borders
Border Rnd 1: Join CC with sl st to corner ch-2 sp before short edge of blanket, ch 1, *hdc in ch-2 sp, hdcBL in each st across side to corner ch-2 sp, (hdc, ch 3, hdc) in corner ch-2 sp, [hdcBL in each st across Strip to ch-2 sp, hdc in ch-2 sp on same Strip, hdc in ch-2 sp on next Strip] 8 times across to last Strip, hdcBL in each st across Strip to corner ch-2 sp,** (hdc, ch 3, hdc) in corner ch-2 sp; rep from * to **, (hdc, ch 2, join with sc to first hdc) in corner ch-2 sp.
Border Rnd 2: Ch 1, hdc in same ch-3 sp, *hdc in each st across to corner ch-3 sp,** (hdc, ch 3, hdc) in corner ch-3 sp; rep from * around, ending last rep at ** before first ch-3 sp, (hdc, ch 3, sl st to first hdc to join) in corner ch-3 sp. Fasten off CC.
Border Rnd 3: Join CD with sl st to any corner ch-3 sp, ch 1, 2 dc in same ch-3 sp, *dc in each st across to corner ch-3 sp,** (2 dc, ch 3, 2 dc) in corner ch-3 sp; rep from * around, ending last rep at ** before first ch-3 sp, (2 dc, ch 2, join with sc to first dc) in corner ch-3 sp.
Border Rnd 4: Ch 1, 2 dc in same ch-3 sp, *dc in each st across to corner ch-3 sp,** (2 dc, ch 3, 2 dc) in corner ch-3 sp; rep from * around, ending last rep at ** before first ch-3 sp, (2 dc, ch 3, sl st to first dc to join) in corner ch-3 sp. Fasten off CD.
-
Finishing
With yarn needle, weave in ends on wrong side of blanket.
© 2018 by Marie Segares (Underground Crafter) and published with permission by AllFreeCrochetAfghanPatterns.com
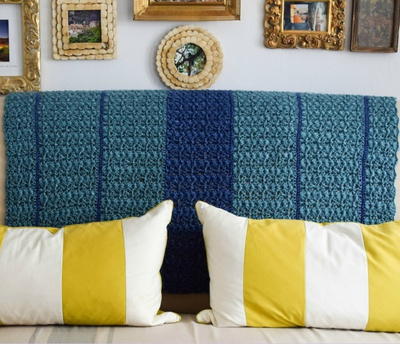
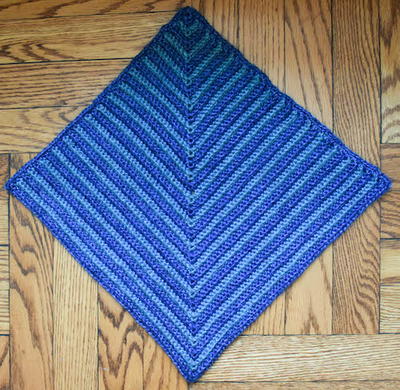
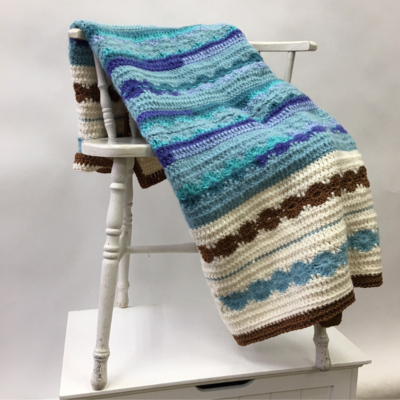
Diagram and Finished Blanket
-
Diagram
-
Finished Blanket
Your Recently Viewed Projects
Thanks for your comment. Don't forget to share!
Tricia108
Nov 28, 2018
This is a good portable project because it is done in strips. Each strip is a bit different so it will not get boring. Children usually do like blankets with a bit of texture and this blanket has that. In addition with some planning it is a good stash buster. I like it. Thanks for the pattern.
AFCAP Editor
Nov 29, 2018
You said it, dear lady! I'm SO thrilled you like this pattern! Marie made it especially for AFCAP's Security Blankets Charity Drive, so you'd be one of the first to hook this pattern! A very grateful kiddo would be very lucky to receive your representation of this beautiful blanket! -Jaji Hammer, AFCAP Editor
Zeemer
Nov 22, 2018
This blanket is so beautiful. I like the uniqueness of the design, the colors used and the overall appeal. It's so sophisticated and elegant. I want to do this.
AFCAP Editor
Nov 29, 2018
Hooray! I'm so glad you're excited to hook this blanket! Are you thinking of donating it to the Security Blankets Charity Drive? I'd LOVE it if you applied your skills to our charity drive since you're such an avid AFCAP reader and clearly a talented crocheter. ) The kiddos would be supremely lucky to receive anything you hook! - Jaji Hammer, AFCAP Editor
Report Inappropriate Comment
Are you sure you would like to report this comment? It will be flagged for our moderators to take action.
Thank you for taking the time to improve the content on our site.