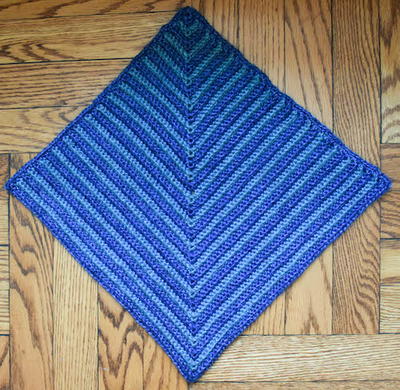
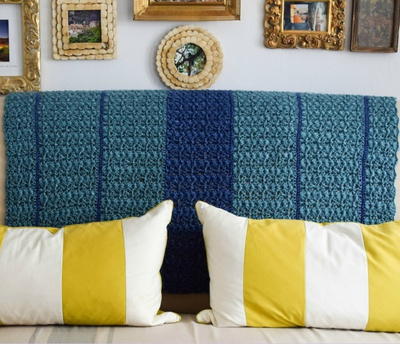
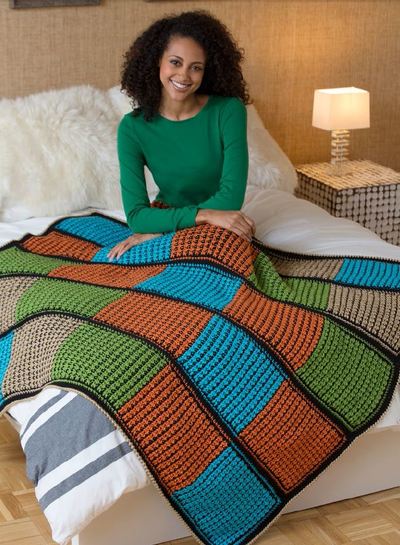
Soulful Sierra Security Blanket
Hook this warm security blanket for a sweet little soul in need of hope.

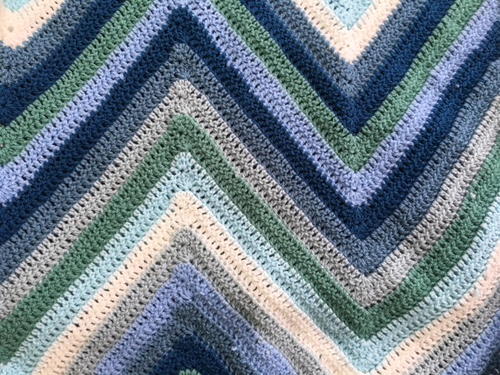
If you're looking to hook an extra special blanket for a sweet little soul, the Soulful Sierra Security Blanket is the pattern for you. With its stunning yet simple chevron design reminiscent of the Sierra Nevadas' peaks and valleys, this easy security blanket pattern works up quickly and fits all requirements for the 2018 Security Blankets Charity Drive. Blogger and designer extraordinaire, Rachele, created this pattern especially for AllFreeCrochetAfghanPatterns so that you all would have a shining example of an easy security blanket to hook for a kiddo in need of warmth and comfort. So do your soul some good this holiday season and hook your good heart into a blanket made especially for a sick or traumatized child. Hope, dear crochet community, is a powerful thing.
CLICK HERE for details on our 2018 Security Blankets Charity Drive!

Crochet HookG/6 or 4 mm hook, H/8 or 5 mm hook
Yarn Weight(4) Medium Weight/Worsted Weight and Aran (16-20 stitches to 4 inches)
Crochet Gauge20 stitches, 24 rows to 10 cm on 4 mm needles
Finished SizeAbout 38 inches x 46 inches
Materials List
- Scheepjes, Colour Crafter, DK, 100% Premium Acrylic, 328yds/100g: Color 1722 = 2 skeins. Colors 1725, 1034, 2017, 2012, 1708, 1820 = 1 skein each.
- Tapestry needle
INSTRUCTIONS:
NOTES:
- Weave in loose ends as work progresses.
- Do not make a turning chain when beginning the row with a single crochet. This creates neater edges without rippling or puckering. Consistently turn work counter-clockwise for neater edges.
Striped pattern in sample blanket is worked by changing to a random new color at the beginning of every odd row starting with Row 3. Cut previous color and weave tail. Join new color with a slip stitch in first st of row. Begin working row as instructed in pattern starting in this same stitch. Save second ball of Color 1722 for border.
Pattern Directions
Note: This blanket does not begin with a long chain like most chevron blankets do; rather, it begins with three Base Triangles which are lined up end to end, and the chevron portion is worked off of them.
-
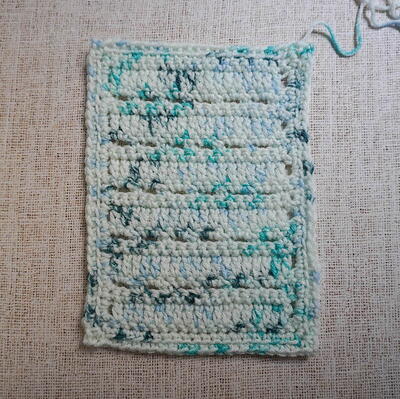
Base Triangle (Make 3)
Row 1 (WS): Using any color, ch3, sl st in third ch from hook to make ring, (sc, ch1 – counts as 1 dc unless otherwise indicated in the pattern, 8dc), turn. (9dc)
Rows 2-12: (Sc, ch1, dc) in first st, dc in all sts to center st, 5dc in center st, dc in all sts to final st, 2dc in final st, turn, cut yarn and weave ends. (75dc after Row 12) -
Chevron portion of blanket
Row 1 (WS): Holding first Base Triangle with WS facing, attach next color with sl st in first dc, sc, ch1 – does not count as a st for the chevron portion, dc2tog, make 34 dc, 5dc in next st, make 34 dc, *yo, insert hook in next st, yo, pull up a lp, yo, pull yarn through 2 lps on hook**, rep from * to ** 2 times, pick up next Base Triangle and holding WS facing, rep from * to ** 3 times over first three sts of Base Triangle – special dc6tog made, yo, draw yarn through all 7 lps on hook, make 34 dc, 5dc in next st, make 34 dc, join third Base Triangle on with special dc6tog as before, make 34 dc, 5dc in next st, make 34 dc, dc3tog, turn. (2 special dc6tog, 1 dc3tog, 1 dc2tog, 219 dc)
Row 2: (Sc, ch1) in dc3tog, dc2tog, * make 34 dc, 5dc in next st, make 34 dc, dc5tog, rep from * 2 times omitting final dc5tog, dc3tog, turn. (2 dc5tog, 1 dc3tog, 1 dc2tog, 219 dc)
Repeat Row 2 until blanket reaches desired length when measured from bottom edge to tallest peak of chevron, changing color when necessary. Be sure to end with a RS row. -
Square off top edge
Note: There are four triangle gaps at the top of the blanket. Each one will be filled in separately as follows.
First triangle gap – hold blanket with WS facing.
Row 1 (WS): Attach new color with sl st in dc2tog, sc in same st, ch1 – does not count as a st for the “Square off top edge” section, dc2tog, make 34 dc, dc3tog placing last “leg” of decrease in the peak stitch of the chevron, turn.
Rows 2-8: Sc in dc3tog, ch1, dc2tog, dc in all sts to final 3 sts, dc3tog placing last “leg” of decrease in dc2tog, turn.
Row 9: Sc in dc3tog, ch1, dc2tog, dc3tog, turn.
Row 10: Sk 1 st, sc in next st, cut yarn.
Second and third triangle gaps
Row 1 (WS): Attach new color with sl st in center dc of chevron peak (same st as ending of Row 1 on first triangle gap), sc in same st, ch1, dc2tog, make 34 dc, dc5tog, make 34 dc, dc3tog placing last “leg” of decrease in the next chevron peak st, turn.
Rows 2-8: Sc, ch1, dc2tog, dc in all sts down to center 5 sts at valley of chevron pattern, dc5tog, dc in all sts across to final 3 sts, dc3tog placing last “leg” of decrease in dc2tog, turn.
Row 9: Sc, ch1, dc2tog, dc5tog, dc3tog, turn.
Row 10: Sc, sk 1, sc in next st, cut yarn.
Fourth triangle gap
Work as for first triangle gap, but begin at the top of the last chevron peak (same st as ending of Row 1 on third triangle gap). -
Work border
Rnd 1: Using color 1722, sl st in any corner, (3sc in corner st, sc evenly to next corner placing 5 sc on the side of every 2 rows, being sure to work them into the dc sts, not around them for a neater edge) 4 times, being sure that opposing sides have the same amount of stitches, sl st in first sc.
Rnd 2: Sc in all sts around, sl st in first sc, cut yarn.
Finishing or Assembly
Weave in remaining ends and block if necessary.
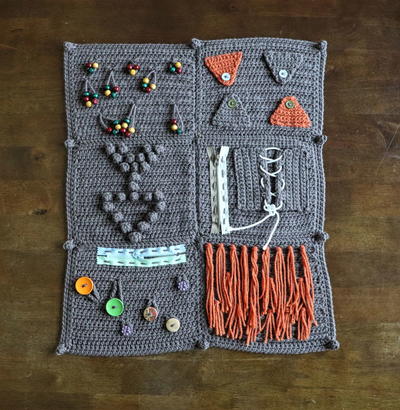
Assembly Diagram
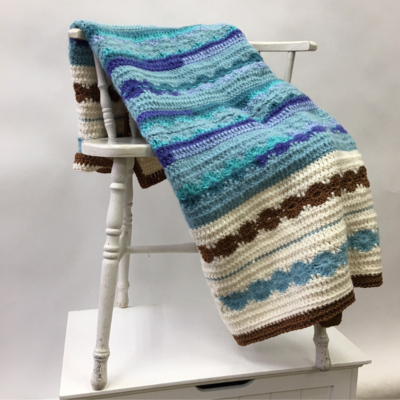
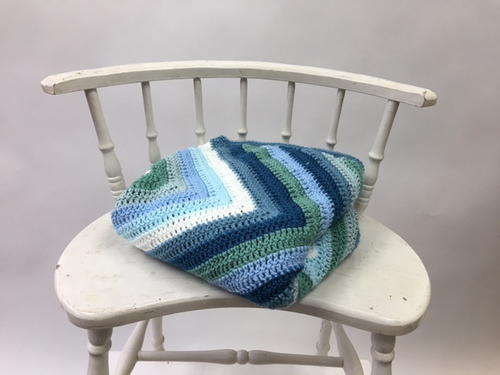
Finished Blanket
Your Recently Viewed Projects

Thanks for your comment. Don't forget to share!
crochetnana
Oct 06, 2020
I struggled with this pattern and frogged it several times, before finally getting the required 75 dc stitches at the end of the 12th row. Once I had the completed sample triangle, I did a row-by-row stitch count which helped immensely. Having a row-by-row stitch count to work from, I was able to see which stitches I needed to dc into at the end of each row, which prevented hours of frustration from having to frog the whole thing. I share this with you now in the hopes that, if you had the same problem, it will now be much easier for you. Row 1 = 9 dc Row 2 = 15 dc Row 3 = 21 dc Row 4 = 27 dc Row 5 = 33 dc Row 6 = 39 dc Row 7 = 45 dc Row 8 = 51 dc Row 9 = 57 dc Row 10 = 63 dc Row 11 = 69 dc Row 12 = 75 dc
AFCAP Editor
Nov 29, 2018
UPDATE! Rachele, the incomparable designer, is clarifying directions with regard to how to "fill in" the pattern after the bottom triangles and she'll have that to me today, so I'll update the pattern by tomorrow so you can all get hookin over the weekend. Thank you to everyone who is seeking to donate to the Blankets Drive! My heart is warmed. And thanks to you all, a lot of kids will be warm, too. ) - Jaji Hammer, AFCAP Editor
AFCAP Editor
Dec 03, 2018
Hey y'all! Our designer extraordinaire has updated the pattern description in an effort to answer your questions and detail the pattern as clearly as possible. Please let me know if you have any further questions- Rachele is happy to answer them and wants you all to be able to hook this beauty with ease and joy! Thank you all, and happy hooking for all those grateful kiddos! ) -Jaji Hammer, AFCAP Editor
Cheryl Y
Nov 29, 2018
Oh my, this Soulful Sierra Security Blanket look so nice but the written pattern is very confusing! After reading the written pattern here on this page, I get so many images in my head. It sounds like it would be to hard to make with the directions. I guess the only way to do it is try to follow each step and go from there. Has anyone made this? How did it turn out for you? Any tips will be great!! Thanks for sharing .
AFCAP Editor
Nov 29, 2018
Hi there! See my comment below, and let me know if you have any specific questions as you start hooking. I can ask the designer and she's very receptive to any questions you might have. It's a very new pattern (that she generously whipped up just for this charity drive), so sometimes there are kinks to work out like with any new pattern. Again, just let me know if you have specific questions once you get started! Thank you for your generosity! ) -Jaji Hammer, AFCAP Editor
Sharon M
Nov 29, 2018
This is a pretty afghan but the pattern is confusing. How many chains do you need to make at the beginning?
AFCAP Editor
Nov 29, 2018
Hi there! So I've spoken with the designer and she told me to let you know "You don't chain at the beginning. First you make the 3 base triangles, which are started with a ch-3 ring. Then you work the chevron using the triangles as the base. So it's not one long chain at the start like many chevron patterns." Do you have any more questions based on this answer? Thank you for your interest in contributing to the blankets drive! Your hook skills are so appreciated. ) - Jaji Hammer, AFCAP Editor
Tricia108
Nov 27, 2018
I like the look of the afghan but I find the directions somewhat confusing. I see where the base triangles are but filling in the rest of the pattern is confusing. I wish there were more photos showing how the steps in making the afghan. Too bad because it is a nice looking piece.
AFCAP Editor
Nov 29, 2018
Hi there! Did my above comment answer your question? Just let me know if you have further questions as the designer is more than happy to clarify steps. Sometimes we have to work out the kinks with new patterns, just like with any new endeavor! Thank you so much for your interest in donating to the blankets drive! And do let me know if I can answer any more questions. Cheers! -Jaji Hammer, AFCAP Editor
ebroomhead 7393636
Nov 26, 2018
There is no photo of this pattern. Patterns should have pictures.
AFCAP Editor
Nov 29, 2018
Hi there! I'm not sure why you're not seeing the images of the pattern... there are four images of the finished blanket and one diagram to help with assembly. Perhaps a function as funky on your computer? Let me know if you're still having trouble viewing the images. Thank you!
Report Inappropriate Comment
Are you sure you would like to report this comment? It will be flagged for our moderators to take action.
Thank you for taking the time to improve the content on our site.