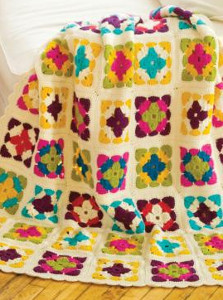
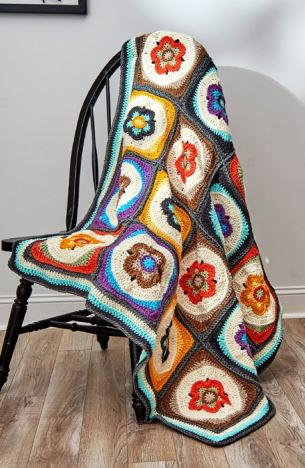
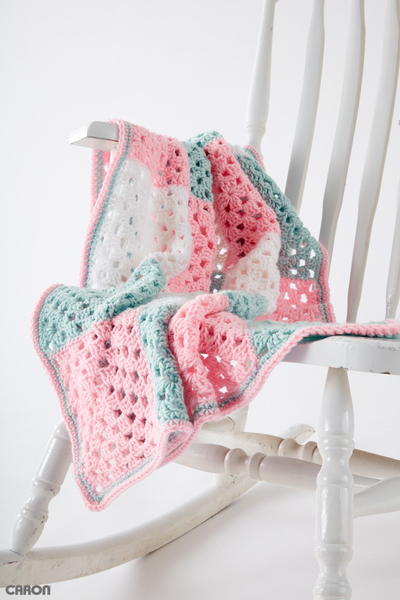
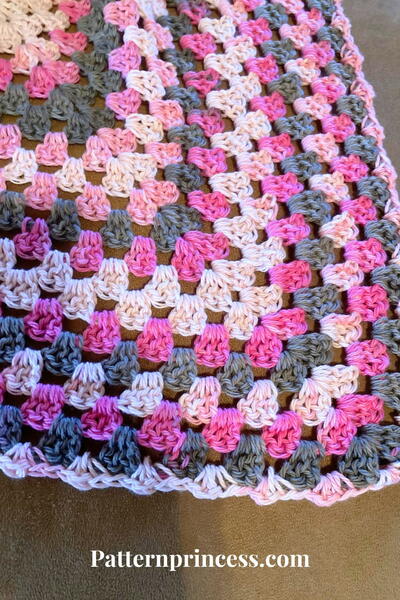
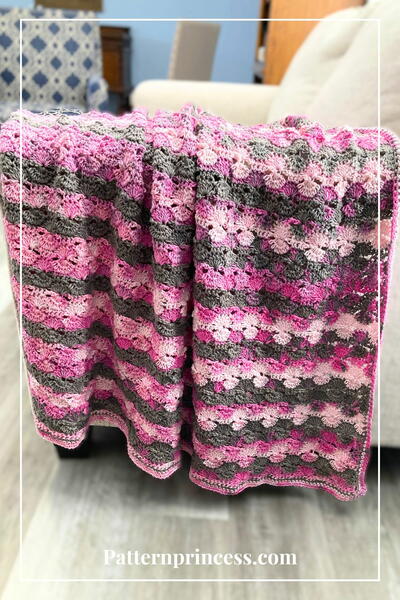
Bright Granny Squares Throw
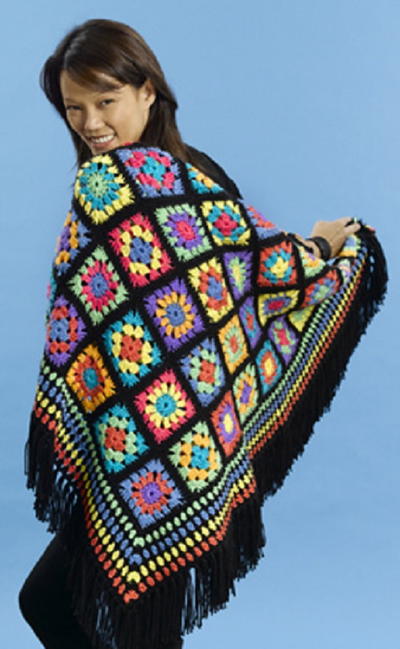
If you need something to brighten and lighten up your living room, consider this Bright Granny Squares Throw. The cheerful colors are irresistible, and easy granny square crocheting instructions result in a lovely patterned motif afghan.

Crochet HookH/8 or 5 mm hook
Yarn Weight(4) Medium Weight/Worsted Weight and Aran (16-20 stitches to 4 inches)
Materials
- Caron International's Simply Soft (100% acrylic; 6 oz/170 g, 330 yds/304 m): #9727 Black (MC), 3 skeins
-
Caron International's Simply Soft Brites (100% acrylic; 6oz/170 g, 330 yds/304 m), 1 skein each of the following colors:
#9610 Grape (A)
#9606 Lemonade (B)
#9608 Blue Mint (C)
#9609 Berry Blue (D)
#9603 Papaya (E)
#9604 Watermelon (F)
#9607 Limelight (G)
#9605 Mango (H) - Crochet hook: One size US H/8 (5 mm), or size to obtain gauge
- Tapestry needle (tn)
GAUGE
Granny Squares = 3 3/4"
TO SAVE TIME, CHECK YOUR GAUGE
STITCHES USED
Chain (ch)
Double crochet (dc)
Half double crochet (hdc)
NOTES
1. Mix and match colors as desired for the squares, finishing each square with a row of MC in sc. One 6 oz [two 3 oz] skein(s) of each CC is sufficient yardage to make the Wrap, alternating colors for the Granny Squares as shown. It may be necessary to purchase additional yarn for predominate colors, if working a more planned color sequence.
2. Squares are worked in-the-round; RS is always facing.
STITCHES USED
Chain (ch)
Double crochet (dc)
Single crochet (sc)
Slip stitch (sl st)
SQUARE A (make 28, alternating colors as desired)
Foundation Ring: Using first color, ch 4, join with a slip st to first ch to form a ring.
Rnd 1 (RS): Ch 3, (counts as a dc), work [2 dc, ch 3] in ring, * work [3 dc in ring, ch 3]; repeat from * twice, end join with a slip st to top of beg ch-3—4 sets of 3 dc separated by ch-3 spaces (the corners of the square).
Fasten off. With RS facing, join second color with a slip st to one of the ch-3 (corner) spaces.
Rnd 2: Ch 3 (counts as a dc), in same ch-3 (corner) space as joining, work [2 dc, ch 3, 3 dc—First Corner made], * ch 1, skip next 3 dc, in next ch-3 (corner) space, work [3 dc, ch 3, 3 dc—Next Corner made]; repeat from * twice, end ch 1, join with a slip st to top of beg ch-3—4 sets of [3-dc, ch-3, 3-dc].
Fasten off. With RS facing, join third color with a slip st to one of the ch-3 (corner) spaces.
Rnd 3: Ch 3 (counts as a dc), in same ch-3 (corner) space as joining, work First Corner as for Rnd 2, * ch 1, skip next 3 dc, work 3 dc in ch-1 space from previous rnd, ch 1, skip next 3 dc, + work Next Corner as for Rnd 2; repeat from * 3 times, ending last repeat at +, end join with a slip st to top of beg ch-3.
Fasten off. With RS facing, join MC with a slip st to one of the ch-3 (corner) spaces.
Rnd 4: Ch 1, in same ch-3 (corner) space as joining, work 2 sc, sc in each st across to next ch-3 (corner) space +, work 3 sc in corner space; repeat from * 3 times, ending last repeat at +, end join with a slip st in first st. Fasten off, leaving an 8" tail for joining blocks.
SQUARE B: (make 28, alternating colors as desired)
Foundation Ring: Work as for Square A.
Rnd 1 (RS): Ch 3, (counts as a dc), work 11 dc in ring, end join with a slip st to top of beg ch-3—12 dc total.
Fasten off. With RS facing, join second color with a slip st to one of the dc of previous rnd.
Rnd 2: Ch 3, (counts as a dc), work 1 dc in same dc as joining, * [ch 1, work 2 dc in next dc] twice, ch 3 +, work 2 dc in next dc; repeat from * around, ending last repeat at +, end join with a slip st to top of beg ch-3.
Fasten off. With RS facing, join third color with a slip st to one of the ch-3 (corner) spaces.
Rnd 3: Ch 3 (counts as a dc), in same ch-3 (corner) space as joining, work First Corner as for Rnd 2 of Square A, [ch 1, dc in next ch-1 space] twice, ch 1 +, in next ch-3 (corner) space, work Next Corner as for Rnd 2 of Square A; repeat from * around, ending last repeat at +, end join with a slip st to top of beg ch-3.
Fasten off. With RS facing, join MC with a slip st to one of the ch-3 (corner) spaces.
Rnd 4: Work as for Rnd 4 of Square A.
THROW
Work 56 Squares (28 Square A, 28 Square B).
Assembly:
Following Layout Diagram, alternating Squares A and B, using tn and 8" tails, sew squares together in 8 strips of 7 Squares each; sew strips together.
BORDER
Color Sequence:
Beginning with Foundation Rnd (MC), alternate 1 row CC with 1 row MC in the following CC sequence – G, A, B, E, or colors of choice.
With RS facing, join MC with a slip st to one corner.
Foundation Rnd: Ch 2 (counts as hdc), in the same space as joining, work 2 hdc ( corner made), work hdc in each st across to next corner +, work 3 hdc in corner; repeat from * 3 times, ending last rep at +, end join with a slip st to top of beg ch-2. Fasten off. With RS facing, join G with a slip st to one corner.
Note: Do NOT ch 1 between dc-2 clusters, it will cause the Border to flair.
Rnd 1: Ch 3 (counts as dc), in same corner st as joining work [1 dc, ch-3, 2 dc—First Corner made], * [skip 1 st, work 2 dc in next st] across to next corner st +, work [2 dc, ch 3, 2 dc in corner st—Next Corner made]; repeat from * 3 times, ending last rep at +, end join with a slip st to top of beg ch-3. Fasten off. With RS facing, join next color in Color Sequence with a slip st to one of the ch-3 (corner) spaces.
Rnds 2 – 8: Repeat Rnd 1, following Color Sequence.
FINISHING
Using tn, weave in all ends.
Fringe:
Using (MC, cut strands 14" long. Holding 3 strands together, fold fringe in half. With RS facing, using crochet hook, * insert hook from WS to RS into first st at one of the corners, pull through loop [fold of strands], insert ends into loop and pull tight against edge; repeat from *, working into every other stitch around entire Wrap.

Your Recently Viewed Projects
Thanks for your comment. Don't forget to share!
Zeemer
Oct 16, 2018
Wow. This is soooo beautiful. This is the kind of project I want to do because it is unique, elegant, sophisticated, eye-catching and not ordinary. I already have a collection of them. Just need time to execute them and GO!
Report Inappropriate Comment
Are you sure you would like to report this comment? It will be flagged for our moderators to take action.
Thank you for taking the time to improve the content on our site.