How to Repair a Crochet Blanket
Learn how to repair a damaged crochet blanket with this crochet tutorial!
Oh no. Your afghan caught on the corner of a table and you heard the awful tearing that can only mean one thing: you just ripped your precious, handmade afghan.
Or maybe your new puppy went on a chewing streak and left slobbery, dangling ends hanging from a gaping hole.
Before you fall on the floor in despair, How to Repair a Crochet Blanket is here to help.
While we can’t give you the exact diagnosis or plan for repair for your afghan, since each one is different, we can give you some advice and steps for approaching such a precious fix. This article will give you tips before you begin, a step-by-step tutorial, and links to afghan repair examples.
Along with keeping your crochet blanket clean and how to wash an afghan, knowing how to repair your afghan when you get a tear is a very important skill. It’s bound to happen sometime, especially if you’re an avid crocheter.
An afghan repair will take some creativity and crochet know-how, and we know you can step up to the plate!
Take a deep breath, and read on.

5 Things to Know Before You Begin
- Your afghan may not look flawless after you fix it. A repair is a repair, not a redo. Using the same color yarn will help mask the repair, but unless you are an amazing crochet master, the stitches won’t line up exactly. You may have to improvise a bit, too. Crocheting is not meant to happen in the middle of a blanket.
- Every crochet repair is different. What you do to repair the project depends on the pattern and the extent of the damage. If you are new to crochet, you might consider carefully taking your project to a more experienced crocheter for their advice and guidance.
- The holes will get bigger before they get smaller. Part of the repair process is taking out stitches that are broken, unraveled, or partially unraveled. This needs to be done if your afghan will be fixed.
- An afghan repair takes a lot of time and concentration. You probably can’t whip this out in a couple of minutes with dinner on the stove and kids running circles around you, especially if it is a large repair. Save it for when you have the time to focus or you might make it worse. Pack your afghan away where it won’t be disturbed until you are able to make the repair.
- The best way to repair an afghan is to re-crochet what was lost. Do not try to repair your afghan with a sewing needle and thread. You will end up splitting yarn and making a not-so-secure repair. Plus, it will probably just look messy.

How to Repair an Afghan Crochet Tutorial
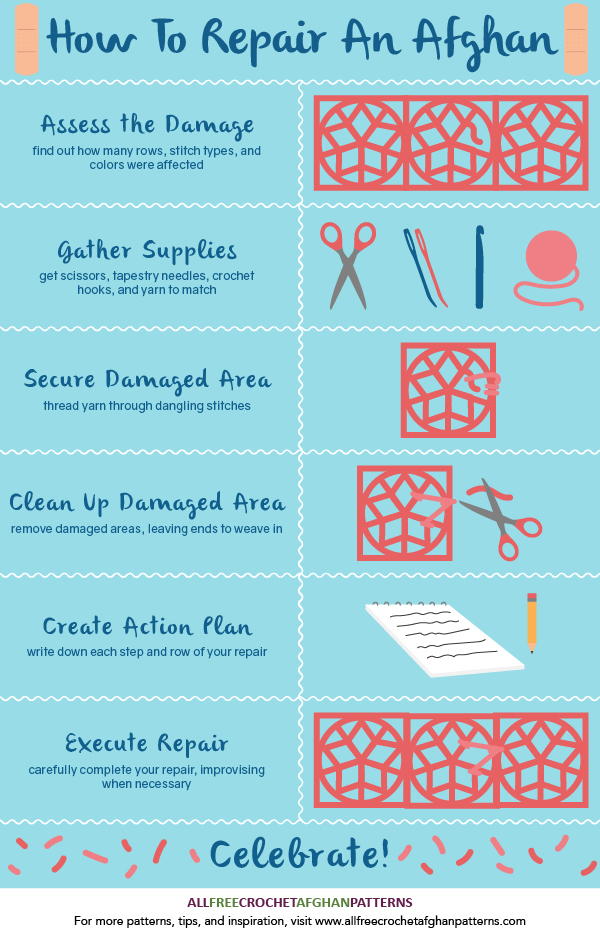
- Lay your afghan out on a flat surface, preferably a table or countertop. Make sure it is a comfortable spot for you to work.
- Assess the damage. Figure out how many rows were affected and what crochet stitches were used to create those rows. Was it two double crochet rows and a single crochet row? Cluster stitch? Picot? What colors were affected by the damaged area? Getting a sense of what has been damaged will help you know what the repair will look like. This will be different depending on if your afghan is made up of granny squares or straight rows, too.
- Gather supplies. If you still have yarn from the areas affected, that is ideal, but find a yarn that matches in color, fiber, and weight. You will also need a tapestry needle, scissors, and a few crochet hooks of different sizes (the size used to make the afghan and one smaller).
- Secure the damaged area. Find the row or round above the last damaged row and thread a piece of contrasting yarn through the loops of the "dangling" stitches using your tapestry needle. This thread will come out later, but for now, it will both hold those stitches in place as you take out the damage and help you see where you need to attach the repaired area. In the photo below, the stitches right above the hole are "dangling" stitches and the stitches right below the hole are damaged and need to be taken out.
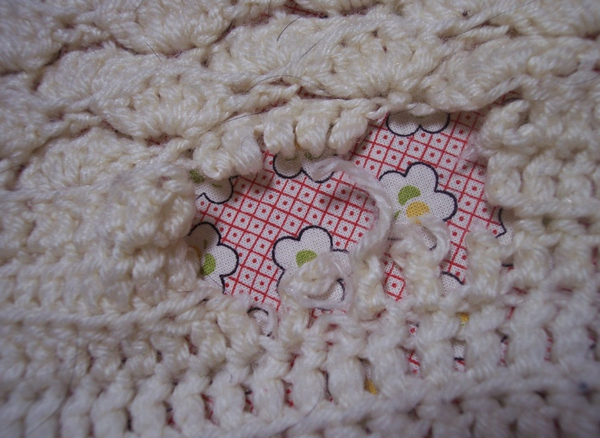
- Clean up the damaged area. Take out damaged stitches carefully. In each row you remove, there will be ends of yarn attached to the non-damaged stitches. Continue removing stitches until these ends are long enough to weave in or, if you’re lucky, an end will be long enough to work with in your repair. Leave these ends for now—you can weave them in at the end.
- Create an action plan for completing the repair. What will you do first? How will you approach every row? Do you need to do 10 single crochets in the first row, then 10 double crochets in the next? It helps to write down your plan to refer back to once you are in the thick of it.
- Join your repair yarn as normal to the first row of your repair through the loop of the connecting stitch. This article on joining yarn in crochet projects can help you learn a great method.
- Execute your repair. The first row you repair will connect to the bottom of your hole and the last will connect to the "dangling" stitches. Be sure to join your repair to the sides of the hole as well. Note that you may need to join new yarn for every row you repair. Assess your own pattern to decide.
- Connect the “dangling” stitches when you reach your final row. You will need to be creative in how to incorporate them into the row below. For many repairs, it works to slip the loop off the hook and then pass it through the "dangling" stitch(es) using your smaller crochet hook. Then replace the loop on your normal hook and continue. For other repairs, chaining a few and passing the chain through the stitch(es) will make the most sense. Repeat one of these processes through all of the “dangling” stitches.
- Weave in your ends once you have completed your repair. You might have a lot of ends to weave in, but it will be worth it. This video can help you learn how to weave in your ends well.
- Celebrate! Your beloved afghan is now back in working order, and you can check that repair off your list.
Want a handy guide? Click the image below to download a free printable version!

Afghan Repair Examples
As mentioned earlier, no afghan is the same, so the measures taken to repair each one will be different. It can be helpful, though, to see how others approached their afghan catastrophes. Thankfully, many people have documented their crochet repairs. You can use their experiences to deal with your own damaged afghan.
Penny from Sewtakeahike repaired a crochet-straight-across afghan that had been chewed by her dog and walks you through her process.
Sunshine from Vintage Threads completed an extensive granny square afghan repair. She had to take out and replace sections from many different parts of the afghan. You can read her five-part repair here on her blog.
Susan from The Crochet Architect completed a repair on an afghan made straight across that had an unfortunate meeting with her puppy. She has a lot of great advice for afghan repair in her story, here. She also has a brief explanation of a granny square afghan repair here on her blog.
Reyna from Yarn In, Yarn Out had a granny square afghan that was in dire need of some help. She provides an in-depth look at the repair is given in this post.
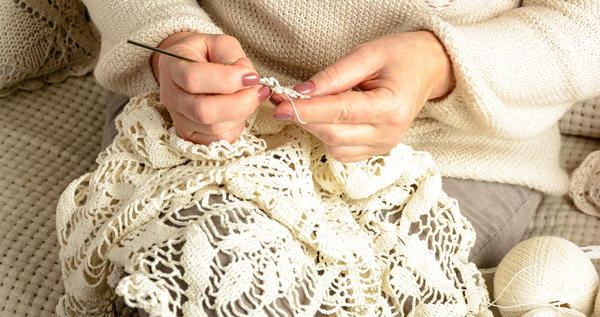
Hopefully, you now have a solid plan in place for repairing your afghan. Don't give up hope when your crochet projects are damaged. Get creative, and get fixing!
Do you have any tips for repairing afghan patterns?
Your Recently Viewed Projects
KLC
Nov 07, 2017
Great tips. I have yet to need this tutorial and fingers crossed I don't. However, I have some old afghans that probably will need repair at some point, so this is good to know!
Report Inappropriate Comment
Are you sure you would like to report this comment? It will be flagged for our moderators to take action.
Thank you for taking the time to improve the content on our site.

