Swirling Fans Crochet Lace Pattern
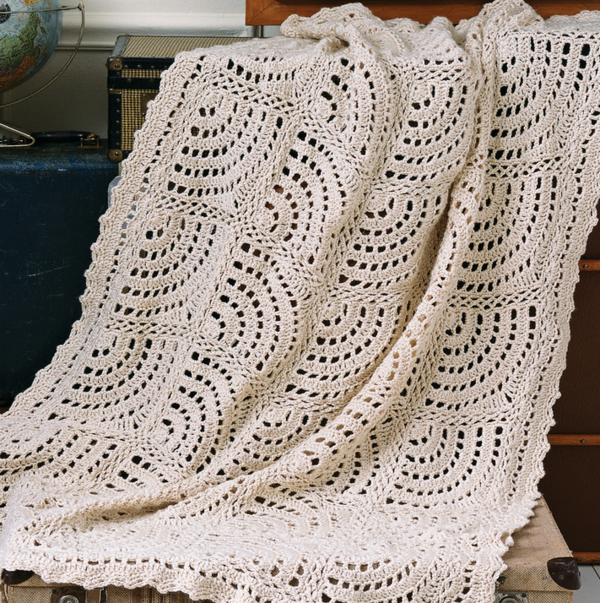
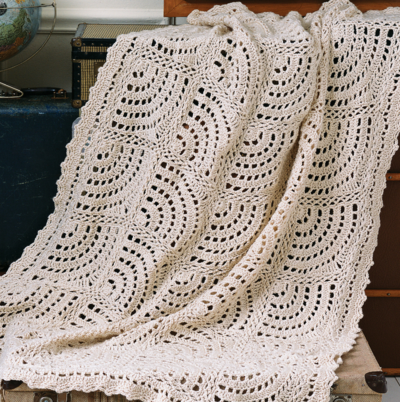
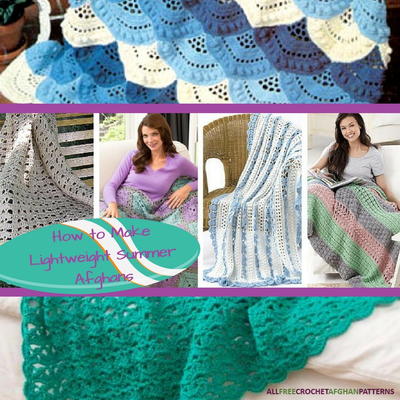
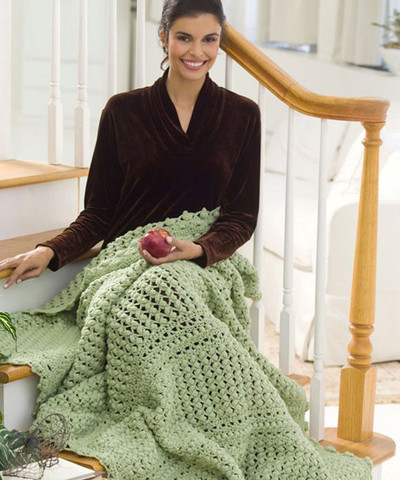
Add a girly antique touch to your home with the Swirling Fans Crochet Lace Pattern. Just like an eyelet doily, this easy crochet pattern has the flair of an elegant tea party. The best part is, it's not difficult to crochet! Learn how to make this crochet lace pattern with a simple tutorial. Vintage crochet can add so much character to a room, so don't hesitate to start this project. With a simple switch of gauge, you get these amazing, swirling lace fans. Can you think of anything more beautiful?

Crochet HookI/9 or 5.5 mm hook
Yarn Weight(4) Medium Weight/Worsted Weight and Aran (16-20 stitches to 4 inches)
Crochet GaugeRows 1 and 2 = 1½” along edge. Square = 8” square.
Finished Size46” x 52”
Materials List
- RED HEART® “Soft Yarn”: 7 balls 4601 Off White
- Crochet Hook: 5.5mm [US I-9]
- Yarn needle
Instructions
How to Make a Gauge Swatch:
Ch 3, join with sl st to form a ring.
Rows 1 and 2: Work same as Rows 1 and 2 on square. Swatch should measure 1½” from ring to top of last dc on Row 2. Adjust hook size if necessary to obtain correct gauge.
Note:
Squares are fan-shaped and a bit off-kilter to form a swirled effect when joined together.
Throw Square (make 35)
Ch 3, join with slip st to form a ring.
Row 1 (right side): Ch 3 (counts as dc), 6 dc in ring – 7 dc. Ch 5 (counts as dc and ch-2 space on next row now and throughout), turn.
Row 2: Skip next dc, [dc in next dc, ch 2, skip next dc] twice, dc in 3rd ch of beginning ch-3 – 4 dc and 3 ch-2 spaces. Ch 3 (counts as dc on next row now and throughout), turn.
Row 3: [Work 3 dc in next ch-space, 2 dc in next dc] twice, 3 dc in next ch-space, dc in 3rd ch of turning ch-5 – 15 dc. Ch 5, turn.
Row 4: Skip next 2 dc, [dc in next dc, ch 2, skip next dc] 5 times, skip next dc, dc in 3rd ch of turning ch-3 – 7 dc and 6 ch-2 spaces. Ch 3, turn.
Row 5: [Work 2 dc in next ch-space, dc in next dc] 5 times, 2 dc in next ch-space, dc in 3rd ch of turning ch-5 – 19 dc. Ch 5, turn.
Row 6: Skip next dc, [dc in next dc, ch 2, skip next dc] 8 times, dc in 3rd ch of turning ch-3 – 10 dc and 9 ch-2 spaces. Ch 3, turn.
Row 7: [Work 2 dc in next ch-space, dc in next dc] 4 times, 3 dc in next ch-space, [dc in next dc, 2 dc in next ch-space] 4 times, dc in 3rd ch of turning ch-5 – 29 dc. Ch 5, turn.
Row 8: Skip next 2 dc, [dc in next dc, ch 2, skip next dc] 12 times, skip next dc, dc in 3rd ch of turning ch-3 – 14 dc and 13 ch-2 spaces. Ch 3, turn.
Row 9: [Work 2 dc in next ch-space, dc in next dc] 12 times, 2 dc in next ch-space, dc in 3rd ch of turning ch-5 – 40 dc. Ch 5, turn.
Row 10: [Skip next 2 dc, dc in next dc, ch 2] twice; *[skip next dc, dc in next dc, ch 2] 6 times*; skip next 2 dc, dc in next dc, ch 2; repeat from * to * once; skip next 2 dc, dc in next dc, ch 2, skip next 2 dc, dc in 3rd ch of turning ch-3 – 18 dc and 17 ch-2 spaces. Fasten off.
Row 11: With right side facing, join with slip st in 5th dc on Row 10, sc in next ch-space and in next dc, hdc in next ch-space and in next dc, dc in next ch-space and in next dc, tr in next ch-space and in next dc; *(tr, ch 2, tr) in next ch-space (corner space made in center ch-space on Row 10); tr in next dc and in next ch-space, dc in next dc and in next ch-space, hdc in next dc and in next ch-space, sc in next dc and in next ch-space, slip st in next dc. Do not fasten off.
Square Border
Note: Round 2 is joining round. See “assembly” for instructions on working joining of squares 2–35 while working Round 2 of border.
Round 1: Starting in next ch-space, sc evenly around entire piece working 2 sc in each remaining ch-space on Row 10, sc in each remaining dc on Row 10, 2 sc around post of each dc and in turning ch-spaces along edges of rows, sc in each st on Row 11, (sc, ch 2, sc) in each of 3 corner sts or spaces on Rows 10 and 11 (corner st at beginning of Row 10 is 3rd ch of turning ch-5) and (2 sc, ch 2, 2 sc) in beginning ring, ending with sc in slip st – 4 corner ch-2 spaces and 92 sc (23 sc on each side between corner ch-2 spaces). Join with slip st in first sc.
Round 2: *Ch 4, skip next 2 sc, slip st in next sc; repeat from * around working (slip st, ch 4, slip st) in each corner ch-2 space – 36 ch-4 spaces. Join with slip st in joining slip st. Fasten off.
Assembly
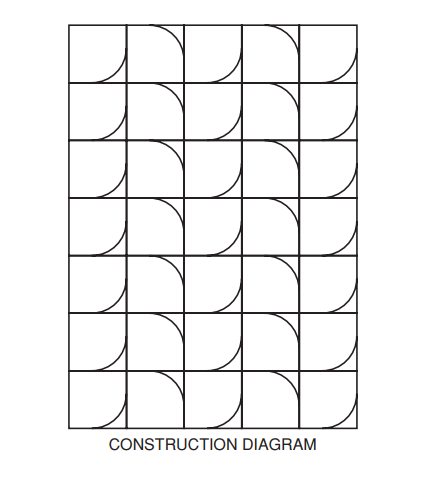
See Construction Diagram below. Join squares into 5 columns with 7 squares in each column. In columns 1, 3, and 5, fans should point down and to the right. In columns 2 and 4, fans should point up and to the right. Join on 1 or 2 sides as necessary while working Round 2 of border. To join ch-4 spaces on 1 side of square, continuing in pattern st, ch 2, drop loop, draw loop under to over through corresponding ch-4 space on adjacent square, ch 2 and continue in pattern st. When joining 2 sides of square where corner of square meets corner of 3 adjacent squares, ch 2, drop loop, draw loop under to over through corresponding corner ch-4 space on first adjacent square, ch 1, drop loop, skip corner ch-4 space on 2nd adjacent square, draw loop under to over through corresponding corner ch-4 space on 3rd adjacent square, ch 2 and continue in pattern st.
Edging
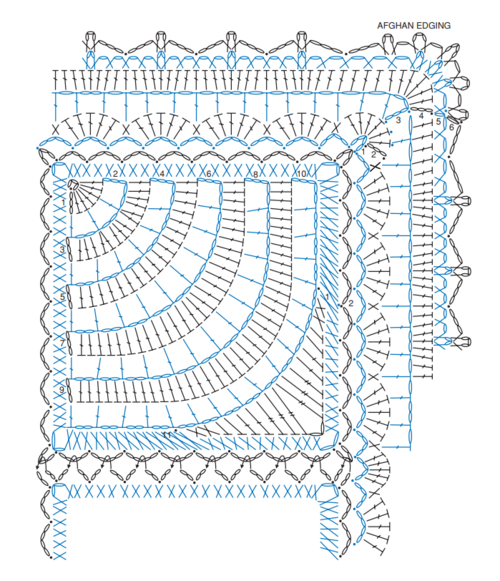
Round 1: With right side facing, join with slip st in any corner ch-4 space, ch 4, slip st in same ch-space as joining; *ch 4, slip st in next ch-4 space; repeat from * around, working (ch 4, slip st in each of next 2 joined corner ch-4 spaces) at each joining seam of squares and (ch 4, slip st) twice in each of 4 corner ch-4 spaces – 220 ch-4 spaces. Ch 4, join with slip st in joining slip st.
Round 2: Slip st in next corner ch-4 space, ch 3 (counts as dc), work 6 dc in same corner ch-4 space (beginning corner shell made), sc in next ch-4 space; *5 dc in next ch-4 space (shell made), sc in next ch-4 space; repeat from * around, working [7 dc in corner ch-4 space (corner shell made), sc in next ch-4 space] at each remaining corner – 106 shells and 4 corner shells. Join with slip st in 3rd ch of beginning ch-3.
Round 3: Slip st in next 3 dc, ch 5 (counts as dc and ch-2 space), dc in same dc as last slip st; ch 1, skip next dc, dc in next dc, ch 1, skip next dc, dc in next sc, work [ch 1, skip next dc, dc in next dc (2nd dc of shell), ch 2, skip next dc, dc in next dc (4th dc of shell), ch 1, skip next dc, dc in next sc] in each shell around and [ch 1, skip next dc, dc in next dc (2nd dc of shell), ch 1, skip next dc, (dc, ch 2, dc) in next dc (center dc of shell), ch 1, skip next dc, dc in next dc (6th dc of shell), ch 1, skip next dc, dc in next sc] in each corner shell. Join with slip st in 3rd ch of beginning ch-5.
Round 4: Ch 3 (counts as dc), work 5 dc in each corner ch-2 space, 3 dc in each ch-2 space along sides, dc in each ch-1 space and in each dc around. Join with slip st in 3rd ch of beginning ch-3.
Round 5: Ch 1, sc in same ch as joining; *ch 1, skip next dc, [(sc, ch 2, sc) in next dc] 3 times, ch 1, skip next dc, sc in next dc; [ch 1, skip next dc, sc in next dc] 3 times*; **ch 1, skip next dc, (sc, ch 2, sc) in next dc (center dc of 3 dc worked in ch-2 space along side), [ch 1, skip next dc, sc in next dc] 3 times**; repeat from ** to ** along sides, ending with one additional repeat of [ch 1, skip next dc, sc in next dc] before corners; repeat from * to * in corners, ending with ch 1, skip next dc, join with slip st in first sc.
Round 6: Ch 1, (sc, ch 3, sc) in same sc as joining; *ch 1, (sc, ch 3, sc) in first ch-2 space in corner, ch 1, (sc, ch 4, sc) in 2nd ch-2 space in corner, ch 1, (sc, ch 3, sc) in 3rd ch-2 space in corner, ch 1, sk next sc, (sc, ch 3, sc) in next sc, ch 3, skip next sc, slip st in next sc*; **ch 3, skip next 2 sc, (sc, ch 3, sc) in next ch-2 space, ch 3, skip next 2 sc, slip st in next sc**; repeat from ** to ** along sides, ending with [ch 3, sk next sc, (sc, ch 3, sc) in next sc] before each corner (except beginning corner) and repeating from * to * in each rem corner. Ch 3, join with sl st in first sc. Fasten off.
Finishing
Weave in all ends. Block lightly.
Abbreviations
- ch(s)
- chain(s)
- dc
- double crochet
- hdc
- half double crochet
- sc
- single crochet
- st(s)
- stitch(es)
- tr
- treble crochet
- yo
- yarn over
- *
- repeat directions following * as many times as indicated
- [ ]
- work directions inside brackets as many times as indicated
- ( )
- work directions inside parentheses into stitch or space indicated
Do you love crocheting lace?
Read NextPink Moscato Double Shell
Your Recently Viewed Projects
mulberrygalprinces s
Aug 16, 2016
I have found that it doesn't matter how long you have been crocheting,there is always something new to learn or share. I have been at it for over 50 years and I still find new patterns that catch my eye. This is one of those. Thank you for sharing.
Zeemer
Apr 14, 2016
I'm sorry for the typo errors in my last comment. I would like to edit it This is the kind of design our mothers would make. I remember growing up having crochet bed covers, crochet doilies, crochet pillow cover and crochet curtains in my grandma' shouse. This so elegant I'd like to include this in my long bucket list. Fellow crocheters, we're lucky the pattern is just right on the same page, we don't have to click a link. For the crochet abbreviations, in case you need them, here is the link http//www.craftyarncouncil.com/crochet.html Read more at http//www.allfreecrochetafghanpatterns.com/Lace/Sw == irling-Fans-Crochet-Lace-Pattern-from-Red-Heart-Ya == rnswukMhhde5HCq155u.99
Zeemer
Apr 04, 2016
This is the kind of design our mothers and would make. I remembering growing up having crochet bed covers, crochet doilies, crochet pillow cover and crochet curtains in my granma' shouse. This so elegant I'd like to include in my long bucket list. fellow crocheters, we're lucky the pattern is just right on the same page, we don't have to click a link. For the crochet abbreviations, in case you need them, here is the link http//www.craftyarncouncil.com/crochet.html
Report Inappropriate Comment
Are you sure you would like to report this comment? It will be flagged for our moderators to take action.
Thank you for taking the time to improve the content on our site.

