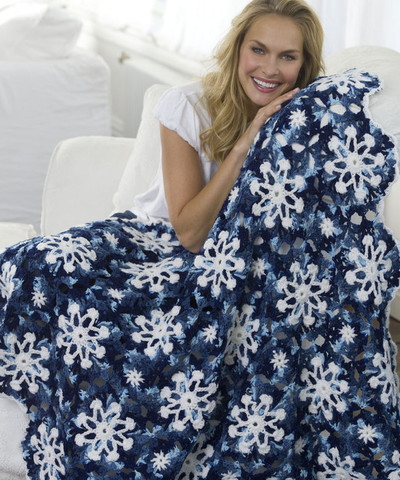
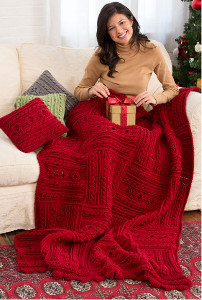
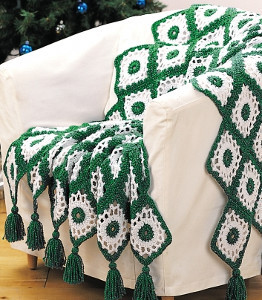
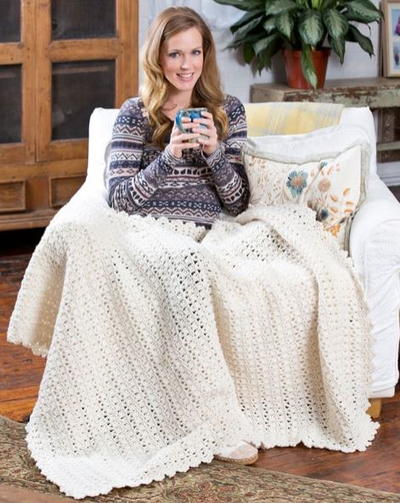
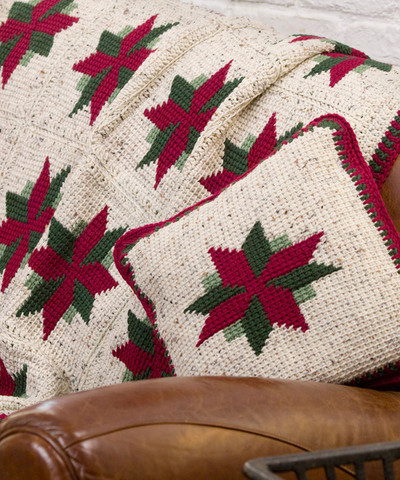
Christmas Star Throw and Pillow
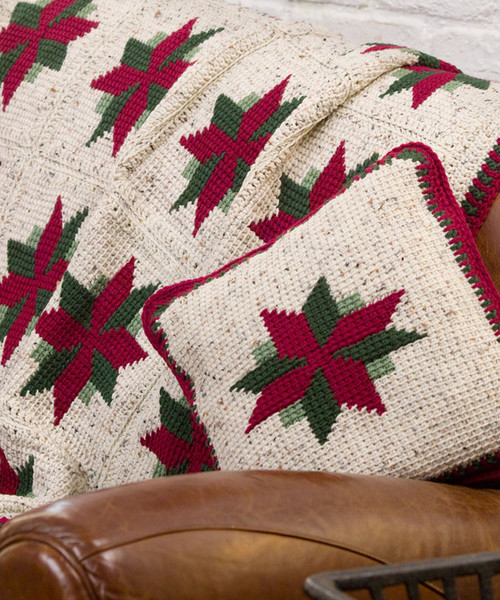
Celebrate the Christmas season with this Christmas Star Throw and Pillow! This free crochet pattern has all the trappings of a perfect holiday decoration. Just as your Christmas tree is not complete without a star on top, your holiday decorating will not be complete without this crochet afghan. This Christmas crochet pattern will instantly add a rustic touch to your holiday decor. Warm up a cup of hot chocolate for yourself and curl up with this throw and crochet pillow. Nothing kicks off the holiday season like a good holiday crochet pattern!

Crochet HookJ/10 or 6 mm hook
Yarn Weight(4) Medium Weight/Worsted Weight and Aran (16-20 stitches to 4 inches)
Materials:
- RED HEART® “Super Saver®”: 7 skeins 4313 Aran Fleck A; 2 balls each 376 Burgandy B and 633 Dark Sage C; 1 Ball 631 Light Sage D.
- Afghan Crochet Hook: 6mm [US J-10].
- Yarn needle
- 16” pillow form
Measurements: Throw measures 42” x 57½”. Pillow measures 15” x 15½”.
Gauge: 13 sts = 3”’ 10 rows = 3” in Afghan st. CHECK YOUR GAUGE. Use any size hook to obtain the gauge.
Notes:
Use separate ball of yarn for each large block of color. Pick up new yarn from under old to twist yarns and prevent holes.
Throw:
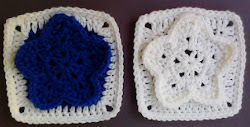
Block (Make 20)
With Afghan hook and A, ch 31.
Row 1: First Half: Insert hook in 2nd ch from hook, yo, draw yarn through st, *insert hook in next ch, yo, draw yarn through st; repeat from * across – 31 loops on hook; Second Half of Row:Yo, draw yarn through first loop on hook, *yo, draw yarn through 2 loops on hook; repeat from * across until 1 loop remains on hook, (counts as first loop of next row).
Rows 2-29: Beginning with Row 2, follow Chart through Row 29.
Row 30: Slip st in each vertical st across. Fasten off.
Block Border
With right side facing and crochet hook, join A in upper right hand corner st.
Round 1: Ch 3 (counts as dc), dc in corner st, dc in next 2 sts, [skip next st, dc in next 3 sts] across to 3 sts from corner, skip next st, dc in next st, 2 dc in next st, ch 2, turn to work along side edge, 2 dc in edge of first row, dc in edge of each row to last row, 2 dc in last row, ch 2, turn to work along opposite edge of foundation ch, dc in next st, dc in next 2 sts, [skip next st, dc in next 3 sts] across to 3 sts before next corner, skip next st, dc in next st, 2 dc in next st, ch 2, turn to work along side edge, 2 dc in edge of first row, dc in edge of each row to last row, 2 dc in last row, ch 2, slip st in top of beginning ch. Fasten off.
Finishing
Arrange Blocks, 4 Blocks wide by 5 Blocks long, for Throw. Holding wrong sides together, join A in one Block with crochet hook, working through sts of two Blocks, slip st Blocks together. Repeat until all Blocks are joined.
Border
Round 1: With right side facing and crochet hook, join A in upper right hand corner dc, ch 3 (counts as first dc), dc in each dc and ch-space around, working (2 dc, ch 2, 2 dc) in each corner ch-2 space, join with slip st to top of beginning ch.
Round 2: Ch 1, sc in each dc around, working (2 sc, ch 2, 2 sc) in each corner ch-2 space, join with slip st to first sc.
Round 3: Ch 3 (counts as first dc), dc in each sc around, working (2 dc, ch 2, 2 dc) in each corner ch-2 space, join with slip st to top of beginning ch 3.
Round 4: Ch 1, sc in each dc around, working 4 sc in each corner ch-2 space, join with slip st to first sc.
Round 5: Ch 3 with B, [dc with D in next sc, dc with B in next sc] around, end with D, join with slip st in top of beginning ch. Cut B.
Round 6: With D only, ch 3 (counts as first dc), dc in same st, ch 1, skip next dc, [dc in next dc, ch 1, skip next dc] 56 times, [2 dc in next dc, ch 1, skip next dc] 4 times, turn to work along side edge, [dc in next dc, ch 1, skip next dc] 85 times, [2 dc in next dc, ch 1, skip next dc] 4 times, turn to work along next edge, [dc in next dc, ch 1, skip next dc] 57 times, turn to work along side edge, [dc in next dc, ch 1, skip next dc] 85 times, [2 dc in next dc, ch 1, skip next dc] 3 times, join with slip st to top of beginning ch 3. Fasten off.
Round 7: Join B in top of beginning ch 3, ch 1, sc in same space, *[sc in next dc, dc in next dc 2 rounds below, pulling dc up to current level of work] across to first set of 2 dc of next corner, [sc in next 2 dc, dc in next dc 2 rounds below, pulling dc up to current level of work] 4 times; repeat from * around to last side, [sc in next dc, dc in next dc 2 rounds below, pulling dc up to current level of work] across to first set of 2 dc of next corner, [sc in next 2 dc, dc in next dc 2 rounds below, pulling dc up to current level of work] 3 times, join with slip st to first sc. Fasten off.
Weave in ends.
Pillow:
Back
With Afghan hook and A, ch 51.
Row 1: First Half: Insert hook in 2nd ch from hook, yo, draw yarn through st, *insert hook in next ch, yo, draw yarn through st; repeat from * across – 51 loops on hook; Second Half of Row: Yo, draw yarn through first loop on hook, *yo, draw yarn through 2 loops on hook; repeat from * across until 1 loop remains on hook, (counts as first loop of next row).
Repeat Row 1 until 41 rows have been worked.
Last Row: Slip st in each vertical st across.Fasten off.
Front
With Afghan hook and A, ch 51.
Row 1: First Half: Insert hook in 2nd ch from hook, yo, draw yarn through st, *insert hook in next ch, yo, draw yarn through st; repeat from * across – 51 loops on hook; Second Half of Row: Yo, draw yarn through first loop on hook, *yo, draw yarn through 2 loops on hook; repeat from * across until 1 loop remains on hook, (counts as first loop of next row).
Repeat Row 1 until 8 rows have been worked.
 Begin Chart
Next Row: Work 5 sts, beginning with Row 3, work Chart across 31 sts, work 5 sts. Continue to work Chart as established until 29 rows have been worked.
Repeat Row 1 for 6 rows.
Last Row: Slip st in each vertical st across. Fasten off.
Block Border
Round 1: With right side of Front facing, join D in upper right hand corner st, ch 3 (counts as first dc), 2 dc in corner st, ch 1, [skip next st, dc in next st] across to last st, 3 dc in last st, turn to work along side edge, 2 dc in edge of row, [ch 1, skip next row, dc in next row] across to last 2 rows, ch 1, skip next row, 2 dc in last row, turn to work along opposite edge of foundation ch, 3 dc in first st, ch 1, [skip next st, dc in next st] across to last st, 3 dc in last st, turn to work along side edge, 2 dc in edge of row, [ch 1,
skip next row, dc in next row] across to last 2 rows, ch 1, skip next row, 2 dc in last row, ch 1, join with slip st to top of beginning ch 3. Fasten off.
Round 2: Join B in top of beginning ch, ch 1, sc in first 3 dc, *[dc in next dc 2 rounds below, pulling dc up to current level of work, sc in next dc] across to first dc of corner 5-dc, sc in next 5 dc; repeat from * around to last side, [dc in next dc 2 rounds below, pulling dc up to current level of work, sc in next dc] across to last 2 dc, sc in next 2 dc, join with slip st in first sc.
Round 3: Ch 1, sc in first 3 sts, *[skip next st, sc in next 3 sts] 12 times, sc in next 48 sts; repeat from * around to last side, [skip next st, sc in next 3 sts] to last 2 sts, sc in next 2sc, join with slip st in first sc. Repeat Border around Pillow Block.
Finishing
Round 1: Holding wrong sides together, join B in one Block with crochet hook, working through sts of two Blocks, ch 1, sc in each st around 3 sides, turn to work along last side, sc in each st across on only 1 piece Fasten off.
Insert pillow form.
Whipstitch opening closed.
Weave in ends.
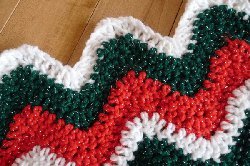
Read NextChristmas Wave Afghan
Your Recently Viewed Projects
Thanks for your comment. Don't forget to share!
mulberrygalprinces s
Sep 20, 2017
This is a beautiful afghan. It's has the Christmas look along with an Amish twist. I love the matching pillow. Imagine this afghan being used as a wall hanging above a sofa with the matching pillow beneath! It would make a spectacular Christmas decoration. Thank you so much for sharing this great idea!
Cheryl Y
Sep 16, 2016
This Christmas Star Throw and Pillow pattern is beautiful! I am hoping I can create one as beautiful. After reading the written pattern that is right here on the front page, I'm hoping I can follow the chart and written directions. I'll make one and if it is to hard, I'll just make a pillow but if it is simple enough to follow, I'll make the throw too. Wish me luck! Thank you so much for this beautiful crochet pattern.
Report Inappropriate Comment
Are you sure you would like to report this comment? It will be flagged for our moderators to take action.
Thank you for taking the time to improve the content on our site.