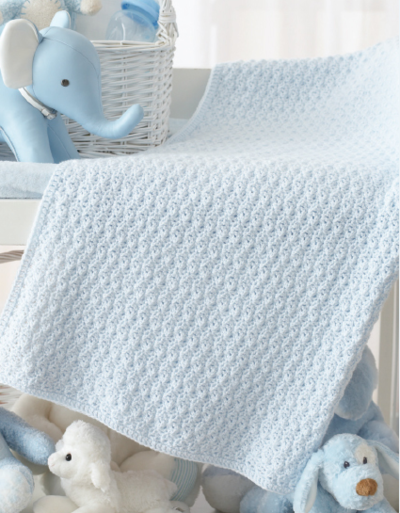
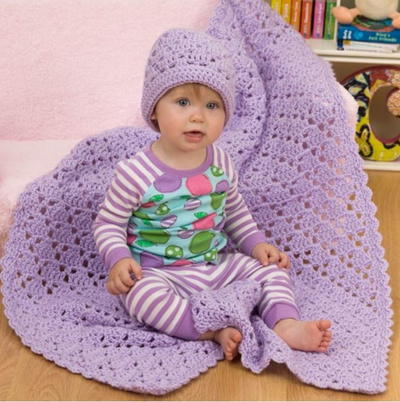
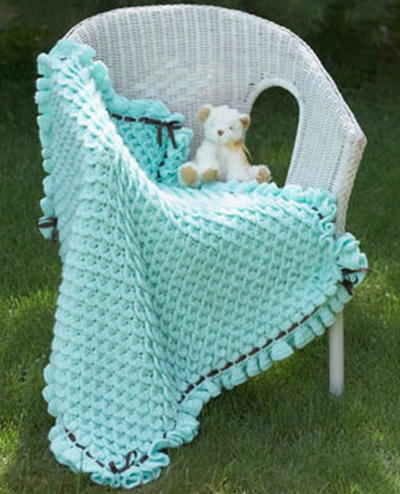
Princess Crocodile Stitch Baby Blanket

Make a little one feel like royalty with the Princess Crocodile Stitch Baby Blanket. Learn how to crochet the crocodile stitch with this lovely pattern. Making a crochet baby blanket pattern using different crochet stitches doesn't have to be difficult.
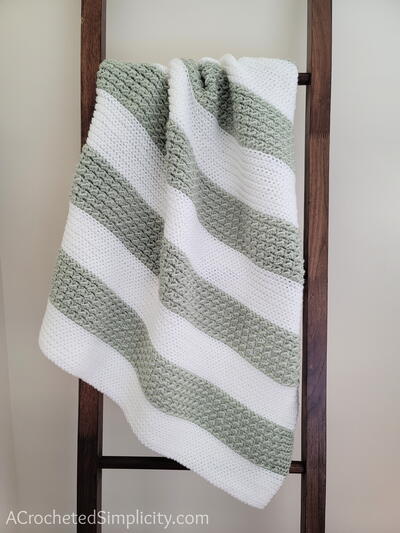
This intermediate crocodile stitch blanket is great for crocheters looking to try something new and creative, and the crocodile stitch is fun to learn. With a beautiful sea foam blue color, you can make this baby afghan for a boy or a girl! What could possibly be a better baby shower gift?

Crochet HookI/9 or 5.5 mm hook
Yarn Weight(3) Light/DK (21-24 stitches to 4 inches)
Crochet Gauge6 V-sts and 8 rows = 4" [10 cm]
Finished SizeApprox 35" [89 cm] square
Materials List
- Bernat® Softee Baby™ (140 g/5 oz; 331 m/362 yds) - Mint (02004) 7 balls
- Size 5.5 mm (U.S. I or 9) crochet hook or size needed to obtain gauge
- Optional: 7 yds [6.5 m] of contrast color satin ribbon 3/8" [9 mm] wide
Instructions for BLANKET:
NOTES:
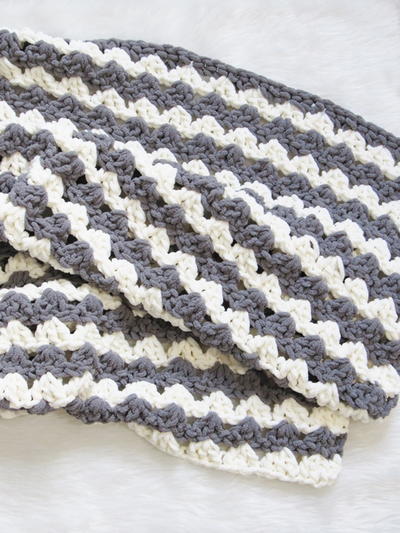
The "crocodile stitch" is formed by a 2 row repeat: a row of V-sts followed by a row of scales (or shells). This is a fairly easy pattern to execute and fast to memorize. The novelty of this design is that the scales are crocheted in front of the V-sts with clusters of double crochet (dc) from top to bottom, then from bottom to top, as opposed to working them on top of the row, like in most shell patterns.
Ch 3 at beg of rnd counts as dc throughout.
-
Ch 124.
1st row: (WS). (1 dc. Ch 1. 1 dc) in 7th ch from hook (counts as 1 dc. Ch 1. 1 dc. Ch 1. 1 dc). *Miss next 2 ch. (1 dc. Ch 1. 1 dc) in next ch - V-st made. Rep from * to last 3 ch. Miss next 2 ch. 1 dc in last ch. Turn. 39 V-sts.
2nd row: Ch 3. Work 4 dc down post of first dc of first V-st. Ch 1. Work 5 dc up post of 2nd dc of the same V-st - beg scale st made (see photo step 1 below). *Miss next V-st. Work 5 dc down post of first dc of next V-st. Ch 1. Work 5 dc up post of 2nd dc of the same V-st - scale st made. Rep from * to last dc. Sl st in last dc. Turn. 20 scale sts (see photo step 2 below).
3rd row: Ch 3. V-st in first ch-1 sp of 1st row. *Inserting hook from front to back between next 2 scales and ch-1 sp of 1st row directly behind it, work V-st (see photo step 3 below). Rep from * to last dc. 1 dc in top of last dc of 1st row. Turn. 39 V-sts (see photo step 4 below).
4th row: Sl st in each of first 2 dc and next ch-1 sp. Miss next dc. *Scale st around next V-st. Miss next V-st. Rep from * to last V-st. Miss next dc. Sl st in next ch-1 sp and each of last 2 dc. Turn. 19 scale sts.
5th row: Ch 3. V-st in first ch-1 sp. *V-st in next ch-1 sp. Inserting hook from front to back between next 2 scales and ch-1 sp of 3rd row directly behind it, work V-st. Rep from * to last ch-1 sp. V-st in last ch-1 sp. 1 dc in last dc. Turn. 39 V-sts.
6th row: Ch 1. Scale st around first V-st. *Miss next V-st. Scale st around next V-st. Rep from * to last dc. Sl st in last dc. Turn. 20 scale sts. Rep 3rd to 6th rows 21 times more, ending on a 6th row. Do not break yarn. There will be 45 rows of scales.
Instructions for EDGING:
-
1st rnd: (RS). Ch 1. 2 sc in same sp as last sl st. Work 89 sc down left side of Blanket, 3 sc in corner, 119 sc across bottom of Blanket, 3 sc in corner, 89 sc up right side of Blanket, 119 sc across top of Blanket and 1 sc in same sp as first sc. Join with sl st in top of first sc. 428 sc.
2nd rnd: Ch 6 (counts as dc and ch-3). 1 dc in same sp as sl st. *[Ch 1. Miss next sc. 1 dc in next sc. Ch 1. Rep from * to next corner sc, (1 dc. Ch 3. 1 dc) in next corner sc] 3 times. **Ch 1. Miss next sc. 1 dc in next sc. Ch 1. Rep from ** to next corner sc. Join with sl st in 3rd ch of ch 6.
3rd rnd: Sl st in first ch-3 sp. Ch 3. 4 dc in same sp as last sl st. *3 dc in each ch-1 sp to next ch- 3 sp. 5 dc in next ch-3 sp. Rep from * around, ending with 3 dc in each ch-1 sp to next ch-3 sp. Join with sl st in top of ch 3.
4th rnd: Ch 3. 2 dc in each dc around. Join with sl st in top of ch 3.
5th rnd: Ch 3. *2 dc in next dc. 1 dc in next dc. Rep from * around. Join with sl st in top of ch 3. Fasten off.
Instructions for FINISHING:
-
Optional: Cut 4 pieces of ribbon measuring 60" [152 cm] each. Weave one ribbon piece along each edge of Blanket. Tie bows at each corner.
-
Check out the video tutorial here:
History of the Crocodile Stitch:
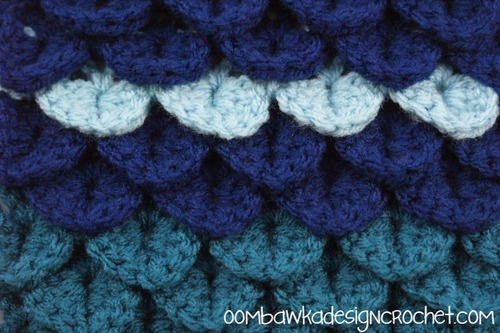
The Crocodile Stitch is a fairly new stitch invention that resembles soft, plush scales like you'd see on a crocodile. As far as technique goes, it uses a lot of yarn to create the three-dimensional look and it can take some time before you fully get it, so patience is a must. To work the crocodile stitch, you basically crochet a row of double crochet stitches with alternating spaces that essentially act as post stitches to work other stitches around it. There are some variations to this stitch, but they all have the same basic steps and techniques at their base.
-
More Crocodile Stitch Patterns
If you want to follow along to a video, check out our Crocodile Stitch Video Tutorial for a step-by-step demonstration. Once you've mastered this technique, you can check out some other Crocodile Stitch Patterns, like the following:
-Crocodile Rock Crochet Baby Blanket
-Ruby and Emerald Crocodile Stitch Blanket
-Crocodile Stitch Afghan Square
Did You Know?
Queen Victoria was an avid knitter and crocheter? Victoria was Queen of Great Britain and Ireland from 20 June 1837 until her death in 1901. Before the nineteenth century, knitting and crocheting were activities only for the poor and out of necessity to earn a living.
But Queen Victoria, who enjoyed the craft, elevated the status of knitting by setting a royal example. By the end of her life, every girl, no matter what class, was taught to knit and crochet.
Read NextFeather Stitch Crochet Baby Blanket
Your Recently Viewed Projects
Thanks for your comment. Don't forget to share!
Zeemer
Oct 18, 2018
This croco stitch I would like to learn. It's nice to this if you want to make a mermaid tail or a skirt or a bag. The possibilities are endless.
Cheryl Y
Jul 12, 2018
I have not made this Princess Crocodile Stitch Baby Blanket yet but it's on my list. I like the look of the Crocodile stitch and once you get the pattern down it works up quickly and looks great. I have made a few things using this stitch and know it does use up the yarn quickly. It makes a nice warm blanket with great texture. Looking forward to making this baby blanket.. Thank you so much for sharing this free crochet baby blanket pattern.
elizabethlaibe85 8 935291
Jul 31, 2017
Thank you for the video. It really helped explain the stitch
Janelle
Oct 20, 2015
I have not made this particular blanket yet, but I have done other items in this stitch and love the way they have turned out!!
dpurdy95 3971680
Apr 23, 2015
I'm not understanding the edging. Could you add photos or video please?
Jerseygirl215
Sep 13, 2014
Please send me the photos referenced in the instructions for princess crocodile blanket.
bmarik 4319371
Dec 15, 2013
You don't show the photos you refer to for the 2nd and 3rd rows when crocheting the princess crocodile stitch baby blanket. br /Thank you,br /Barbara
iam4uofmichigan 78 47840
Oct 17, 2013
the edging directions do not show 3 single crochets in the third corner, is this correct or a typo in the pattern?
Judy2g
Sep 20, 2013
Help! I can't figure out how to end and start the rows. Do you have a video or photos? The photos in the pattern are just ads. Thanks. Judy
Judy2g
Sep 20, 2013
Help! I can't understand how to end the rows and begin the next row. Do you have a video or pictures? The patterns say see photo 2, but it doesn't show a photo, just advertisement. Can you help?
Wedou
Aug 09, 2013
For patterns taken from yarn companies, please don't change the name and please add the link. "See photo tutorial on downloadable pdf version" above doesn't help, since it isn't included. Neither is the link to where the pattern actually lives. For patterns reposted here, I always wind up having to to to the actual site anyway, in this case Bernat.
racingmom1 2512691
Aug 08, 2013
I made this blanket for my niece. It took a lot of time , yarn, and patience but the finished product was beautiful. Excellent pattern!
Report Inappropriate Comment
Are you sure you would like to report this comment? It will be flagged for our moderators to take action.
Thank you for taking the time to improve the content on our site.