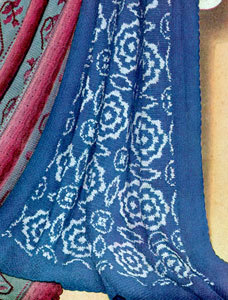
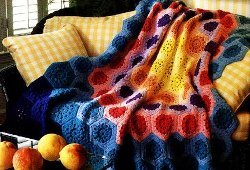
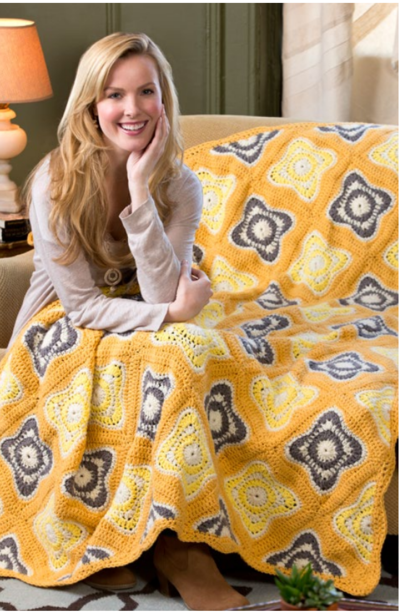
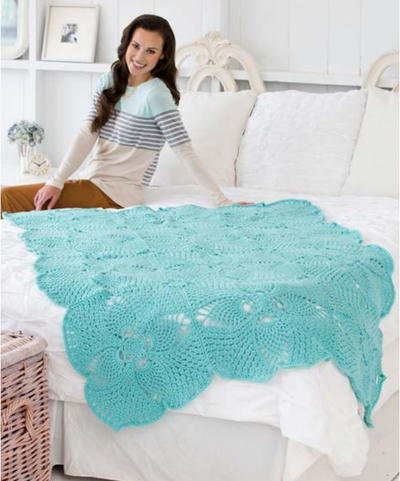
Crochet Refreshing Throw

The Crochet Refreshing Throw is a granny square afghan comprised of pastel shades and delicately lacy floral motifs. This easy crochet blanket is worked up by first crocheting individual granny square motifs in varying hues and then joining them together, making this a perfect pattern for a road trip or just on-the-go. The light colors and the lace design makes this blanket ideal for the spring and summer.
Check out the video below to see another granny square blanket pattern you could create if you really love this one!

Crochet HookH/8 or 5 mm hook
Yarn Weight(3) Light/DK (21-24 stitches to 4 inches)
Crochet GaugeSquare = 7” x 7”.
CHECK YOUR GAUGE. Use any size hook to obtain the gauge.
Finished SizeAfghan measures 45” x 52”.
Materials List
-
RED HEART® “Eco-Ways™”:
2 Skeins each 1821 Blue Cloud A, 3372 Petal B, 3313 Oyster C and 3520 Aquarium E, 3 skeins 1615 Lichen D. - Crochet Hook: 5mm [US H-8].
- Yarn needle.
Crochet Refreshing Throw
SPECIAL ABBREVIATIONS:
Fpdc (front post dc) = Yarn over, insert hook from front to back to front around post of next st and draw up a loop, [yarn over and draw through 2 loops on hook] twice.
Fpdc dec (front post dc decrease) = [Yarn over, insert hook from front to back to front around post of next Fpdc and draw up a loop, yarn over and draw through 2 loops on hook] twice, yarn over and draw through all 3 loops on hook.
Pattern
-
SQUARE:
Make total of 42 squares: 9 in A, 10 each in B and C, 7 in D and 6 in E. -
Rnd 1: Ch 5, [dc ch 1] 7 times all in 5th ch from hook; join with a slip st in 3rd ch of remaining ch-4.
-
Rnd 2: Slip st in first ch-1 space, ch 2, hdc in same space, Fpdc around next dc, [2 hdc in next space, Fpdc around next dc] 7 times; join with a slip st in top of ch-2.
-
Rnd 3: Ch 2, dc in space before the next hdc, hdc in next hdc, Fpdc around next Fpdc, [hdc in next hdc, dc in space before the next hdc, hdc in next hdc, Fpdc around next Fpdc] 7 times; join.
-
Rnd 4: Slip st in next dc, ch 3, (2 dc, ch 3, 3 dc) all in same dc, * ch 1, Fpdc around next Fpdc, ch 1, skip next hdc, sc in next dc, ch 1, Fpdc around next Fpdc, ch 1, skip next hdc **, (3 dc, ch 3, 3 dc) all in next dc; repeat from * around, end at **; join in top of ch-3.
-
Rnd 5: Slip st in next 2 dc and ch-3 space, ch 3, (2 dc, ch 3, 3 dc) all in same space, * ch 1, 3 dc in next ch-1 space, ch 1, Fpdc dec, ch 1, 3 dc in next ch-1 space, ch 1 **, (3 dc, ch 3, 3 dc) all in next ch-3 space; repeat from * around; join.
-
Rnd 6: Slip st in next dc, ch 4 (counts as dc, ch 1), * (dc, ch 3, dc) all in next ch-3 space, [ch 1, skip next dc, dc in next dc, ch 1, dc in next ch-1 space] twice **, [ch 1, dc in next ch-1 space, ch 1, skip next dc, dc in next dc] twice, ch 1; repeat from * around, end at **; ch 1, dc in next ch-1 space, ch 1, skip next dc, dc in next dc, ch 1, dc in next ch-1 space, ch 1; join in 3rd ch of ch-4.
-
Rnd 7: Ch 3, dc in next ch-1 space, dc in next dc, * (2 dc, ch 3, 2 dc) all in ch-3 space, dc in next dc, [dc in next ch-1 space, dc in next dc] 9 times; repeat from * around working sts in brackets 7 times instead of 9 times, dc in next space; join. Fasten off. Weave in ends.
-
ASSEMBLY:
With right sides together and working in back loops only, whip stitch squares together into 6 strips of 7 squares each as follows (NOTE: first square of each strip is on the lower edge): -
Strip 1: (Left Side): D, B, A, C, B, A, E.
-
Strip 2: C, E, B, D, E, D, C.
-
Strip 3: B, A, C, A, C, A, B.
-
Strip 4: D, B, E, C, B, E, D.
-
Strip 5: A, C, D, B, A, C, A.
-
Strip 6: (Right Side): B, E, C, A, D, B, C.
-
Whip stitch strips together in back loops.
-
Border:
Rnd 1: With right side facing and working in back loops only, join D in center ch of top left corner ch-3 space; ch 1, 2 sc in same st, sc evenly around all sides working 3 sc in center ch of ch-3 at next 3 corners and work 1 more sc in same ch as first sc; join in first sc. -
Rnd 2: Ch 3, dc in same sc, skip next 2 sc, * (slip st, ch 3, dc) all in next sc, skip next 2 sc; repeat from * around, ending with slip st in first st of round. Fasten off. Weave in ends.
Your Recently Viewed Projects
Thanks for your comment. Don't forget to share!
Delphine Bryant
Sep 09, 2018
The design of this motif granny square afghan is really pretty. Depending on the angle you look at it from it can either appear as a flower or a cross and it has a lot of texture as well. I love the soft colors and I am sure it would also look great in bold colors as well. Thank you for sharing the pattern.
Morehouse17
Aug 14, 2018
This is a really pretty granny square throw. The design would be beautiful as a baby's christening blanket because the center symbol sort of looks like a cross. Crocheted in a pale pink or blue depending on the gender of the baby or white or beige. This would be an heirloom item for sure.
Sandy O
Aug 09, 2017
This pattern is confusing in rd but this is what I have figured out When you finish rd you have an pointed star with the FPDC between the points in rd slip stitch into the space of the shell and make your shell ch DC into the ch sp then and here is where the pattern is poorly written you have to make the FPDC dec by catching tthis FPDC and the next one which is after the next point of the star so your FPDC dec will span a shell and that will go unworked Then ch DC in the next ch sp after the second DC of the FPDC dec ch shell in the space of the shell ch DC in ch sp FPDC dec over the next FPDC dec's so at the end of rd you will have shells and FPDC dec's covering unworked shells from the previous…Read More row This will form your square shape The unworked shells which are under the FPDC dec's will be picked up in next rounds
Sandy O
Aug 17, 2017
I just wanted to correct something from my comment above. The unworked shells covered by the FPDC dec remain unworked in round 6
sajones040 6116443
Jan 20, 2017
Glad to see I'm not the only one having trouble with this. Love the look of the pattern. I've started it 4 times now and can't get past round 4. Each time, it doesn't look square, no matter how carefully I think I'm following the pattern. Giving up for now, but hope to come back and find help
AFC Editor Julia
Jun 09, 2016
Hi everyone, This pattern is straight from Red Heart. If you're still having trouble with this pattern, please reply to this comment and let me know where the issue is and we can try to figure it out. Thanks so much! Julia, editor of AllFreeCrochetAfghanPatterns
Zeemer
Jun 07, 2016
This refreshing crochet throw has a unique color combination, something you didn't expect the choice of colors for this particular project. It's nice to o this. Thanks for the pattern which is just right on the same page.
TWODRAGONSE 591466 3
May 19, 2016
I went searching for this pattern elsewhere. I checked Red Heart since the pattern recommended Red Heart yarn and the pattern is available there under free patterns, same pattern name. However, after reading the downloaded pattern, I do not see any differences in that and what was posted here. If this pattern does not work for me, Red Heart had a couple other patterns that are similar and would, I think, look beautiful in this design. The other pattern names are Colorful Squares Throw, and Lacy Squares Throw
joconley 7920757
May 19, 2016
Having just finished my first square I can understand why some crocheters are having a hard time with this pattern. First it is NOT an EASY pattern. If anything it should be classified as an Intermediate. It is definitely not for the beginner crocheter.
kajekemom 3863457
May 02, 2016
Doubt the previous commenters are still reading this but I'm going to give this a shot tomorrow...I'll let you know what I find out.
catsnow4 1472477
Mar 08, 2016
Has the instructions been corrected and updated for Crochet Refreshing Throw I read the previous reviews and seems no one has answered back???
margoinkeswick 728 2480
May 11, 2015
This is not easy tried 8 time evry time row 4 is not right.
sandeleh
Nov 29, 2012
I made this throw a couple of years ago for a new baby. It was very well received and easy to make. Enjoyable on both ends!
Report Inappropriate Comment
Are you sure you would like to report this comment? It will be flagged for our moderators to take action.
Thank you for taking the time to improve the content on our site.