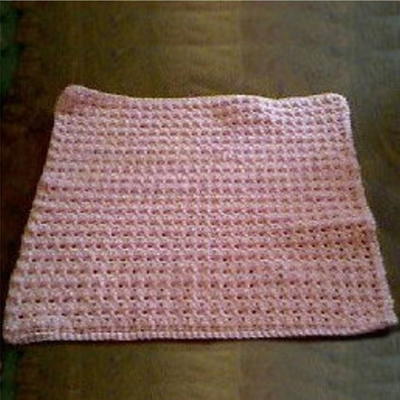
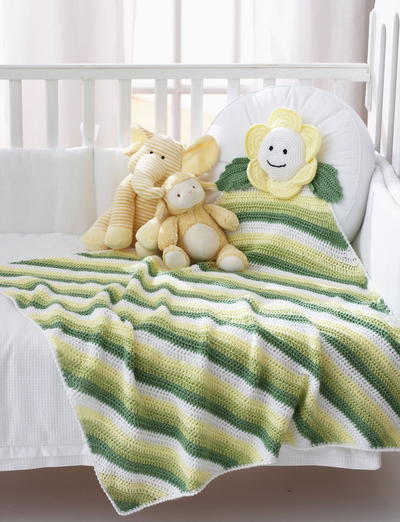
Natural Daisy Baby Blanket

Light up a baby's face with the fun loving Natural Daisy Baby Blanket. With beautiful greens and a smiling crochet flower pattern attachment, this baby blanket crochet pattern is the cutest garden you've ever seen. Use the crochet slip stitch to get a beautiful, comfy texture that babies will love to play on.
The little daisy accent really tops it off! It's the perfect resting place for your little one's head during a nap. Make this crochet baby blanket pattern for a baby shower gift - it will be a treasure that no one will forget.

Crochet HookE/4 or 3.5 mm hook, G/6 or 4 mm hook
Yarn Weight(4) Medium Weight/Worsted Weight and Aran (16-20 stitches to 4 inches)
Crochet Gauge17 dc and 10 rows = 4 ins [10 cm] with larger hook
Finished SizeApprox 36" [91.5 cm] square
Materials List
- 1 each of Bernat Softee Baby: Contrast A Fresh Green, Contrast B: Soft Fern (30221), Contrast C: Lemon (02003), Contrast D: White (02000)
- Sizes 3.5 mm (U.S. E or 4) and 4 mm (U.S. G or 6) crochet hooks or size needed to obtain gauge
- Stuffing
- Black embroidery floss
Instructions for BLANKET:
Notes: To change colors, work to last 2 loops on hook. Drop previous color from hook, draw new color through and proceed.
Ch 3 at beg of dc rows counts as dc throughout.
With larger hook and A, ch 5.
-
1st row: (RS). 2 dc in 4th ch from hook (counts as 3 dc). 2 dc in next ch. 5 dc. Turn.
2nd row: Ch 3. 2 dc in first st (2 inc made). 1 dc in each of next 3 sts. 3 dc in last st (2 inc made). 9 dc. Join B. Turn.
3rd row: With B, ch 3. 2 dc in first st (2 inc made). 1 dc in each dc to last dc. 3 dc in last st (2 inc made). Turn. 13 dc.
3 rows of Stripe Pat are complete. Keeping cont of Stripe Pat, rep last row until side edges measure approx 36 ins [91.5 cm].
Decrease as follows:
Next row: Ch 3. (Yoh and draw up a loop in next dc. Yoh and draw through 2 loops on hook) twice. Yoh and draw through all loops on hook - dc2tog made. 1 dc in each st to last 3 sts. (Yoh and draw up a loop in next dc. Yoh and draw through 2 loops on hook) 3 times. Yoh and draw through all loops on hook - dc3tog made. Turn.
Keeping cont of Stripe Pat, rep last row to 5 sts.
Next row: Ch 3. Dc2tog. 1 dc in next dc. Dc2tog. Turn.
Next row: Ch 3. Dc3tog.
Fasten off.
Edging:
1st rnd: (RS). With larger hook, join D with sl st in any corner. Ch 1. Work 1 rnd sc evenly around Blanket, working 3 sc in each corner. Join with sl st to first sc.
2nd rnd: Ch 1. Working from left to right, instead of from right to left as usual, work 1 reverse sc in each sc around. Join with sl st to first reverse sc.
Fasten off.
Instructions for FLOWER:
Center (make 2)
With smaller hook and C, ch 2.
-
1st rnd: (RS). 8 sc in 2nd ch from hook. Join with sl st to first sc
2nd rnd: Ch 1. *2 sc in next sc. Rep from * around. Join with sl st to first sc. 16 sc.
3rd rnd: Ch 1. *1 sc in next sc. 2 sc in next sc. Rep from * around. Join with sl st to first sc. 24 sc.
4th rnd: Ch 1. *2 sc in next sc. 1 sc in each of next 2 sc. Rep from * around. Join with sl st to first sc. 32 sc.
5th rnd: Ch 1. *1 sc in each of next 3 sc. 2 sc in next sc. Rep from * around. Join with sl st to first sc. 40 sc.
6th rnd: Ch 1. *1 sc in each of next 2 sc. 2 sc in next sc. 1 sc in each of next 2 sc. Rep from * around. Join with sl st to first sc. 48 sc
7th rnd: Ch 1. *1 sc in each of next 5 sc. 2 sc in next sc. Rep from * around. Join with sl st to first sc. 56 sc.
8th rnd: Ch 1. *1 sc in each of next 3 sc. 2 sc in next sc. 1 sc in each of next 3 sc. Rep from * around. Join with sl st to first sc. 64 sc.
9th rnd: Ch 1. *1 sc in each of next 7 sc. 2 sc in next sc. Rep from * around. Join with sl st to first sc. 72 sc.
10th rnd: Ch 1. *1 sc in each of next 4 sc. 2 sc in next sc. 1 sc in each of next 4 sc. Rep from * around. Join with sl st to first sc. 80 sc.
11th rnd: Ch 1. *1 sc in each of next 9 sc. 2 sc in next sc. Rep from * around. Join with sl st to first sc. 88 sc.
12th rnd: Ch 1. *1 sc in each of next 5 sc. 2 sc in next sc. 1 sc in each of next 5 sc. Rep from * around. Join with sl st to first sc. 96 sc.
Fasten off.
Place WS of Center pieces tog. Join C with sl st at edge and work 1 rnd of sc around, leaving an opening for stuffing. Stuff Center lightly. Crochet opening closed.
Fasten off.
Instructions for PETALS:
(make 6)
With smaller hook and D, ch 4.
-
1st rnd: 11 dc in 4th ch from hook. Join with sl st to top of ch 3. 12 dc.
2nd rnd: Ch 3 (counts as dc). 1 dc in same sp as last sl st. 2 dc in each dc around. Join with sl st to top of ch 3. 24 dc.
3rd rnd: Ch 3 (counts as dc). 1 dc in same sp as last sl st. *1 dc in next dc. 2 dc in next dc. Rep from * around to last dc. 1 dc in last dc. Join with sl st to top of ch 3. 36 dc.
4th rnd: With B, ch 3 (counts as dc). 1 dc in same sp as last sl st. *1 dc in next dc. 2 dc in next dc. Rep from * around to last dc. 1 dc in last dc. Join with sl st to top of ch 3. 54 dc.
Do not break yarn.
Fold Petal in half with WS tog and beg of rnd at edge of fold.
Next row: Ch 1. Working through both thicknesses, work 1 row of sc across open edge to join. Do not turn.
Next row: Ch 1. Working from left to right, instead of from right to left as usual, work 1 reverse sc in each sc around. Join with sl st to first sc.
Fasten off.
Instructions for LEAVES:
(make 2)
With smaller hook and A, ch 18.
-
1st row: (RS). 1 dc in 4th ch from hook (counts as 2 dc). 1 dc in each ch to last ch. 5 dc in last ch. Working in rem loops of foundation ch across opposite side of ch, work 1 sc in each of next 15 sts. Turn.
2nd row: Sl st in each of first 4 dc. Ch 3 (counts as dc). 1 dc in each of next 13 dc. 5 dc in next dc. 1 dc in each of next 14 dc. Turn.
3rd row: Sl st in each of first 4 dc. Ch 3 (counts as dc). 1 dc in each of next 12 dc. 5 dc in next dc. 1 dc in each of next 13 dc. Turn.
4th row: Sl st in each of first 4 dc. Ch 3 (counts as dc). 1 dc in each of next 11 dc. 5 dc in next dc. 1 dc in each of next 12 dc.
Fasten off.
Instructions for FINISHING:
-
Sew Petals evenly around edge of Center, gathering in fullness. Sew Leaves to Center behind Petals as seen in picture. With embroidery floss, embroider eyes using satin stitch and mouth using chain stitch.
Sew Flower to corner of Blanket.
Video Tutorial:
If you are a visual learner, then take a look at this video tutorial below:
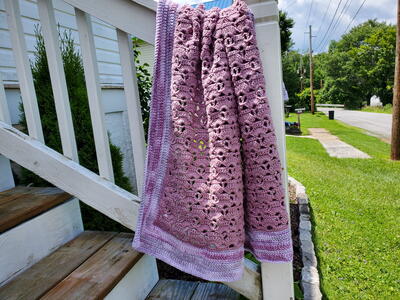
Read NextFrench Lilacs Baby Blanket
Your Recently Viewed Projects
Thanks for your comment. Don't forget to share!
ducjes
Mar 31, 2019
Nice project. I found it difficult to get a square blanket. Will not make it again although it turnde out quite nice. Sorry that i cannot ahare a picture, the reviews are text only.
tscag61 5423230
Sep 08, 2018
I am looking at the directions for the petals. Are the letter wrong for the petals? Its telling me to use D -white first then B- soft fern. The picture shows the petals in all lemon. Can someone clarify this for me?
erikenisis 8247539
Jan 07, 2019
Same here. And there are mistakes in the flower also. The increases are miscounted. Every row should be 8 sts extra, the pattern has lots and lots more.
AFCAP Editor
Jan 09, 2019
Hi there. Have you tried watching the video tutorial for clarification? If you still have questions, you can always email Yarnspirations for further advice- as it's their pattern, I'm wary to offer specific instructions and would recommend consulting their team. Hope this helps! Thanks! -Jaji, AFCAP Editor
Zeemer
Aug 22, 2017
I love the green/lemon/white mix of colors. Green is always very refreshing and always a welcome color whether in combination or a solid color. This Natural Daisy Baby Blanket is great as baby shower or christening present. The mommy will love it and baby will be comfy.
TychaBrahe
May 30, 2017
I don't understand the decrease instructions. On the increase, you increase two stitches each end for a total of four increased stitches per row (5 - 9 - 13). On the decrease rows, though, row 1 has two dc3tog, which matches, but row 2 has two dc2togs, which doesn't. It seems this would make the blanket more like a baseball diamond, which isn't quite a true diamond.
erikenisis 8247539
Jan 07, 2019
in the increases you have 1 and 2 per row. This matches the decreases.
Cheryl Y
May 20, 2017
Oh my gosh how cute! I found my next project for the fall for my soon to be here Great Grand Baby! I love this Natural Daisy Baby Blanket pattern that is right here on this page and it has a print tab. The corner to corner directions are well written and easy to understand and follow, I can see this one coming out nicely. I like the sun pillow too. The colors in this one will work for any gender and the blanket is a nice size. Looking forward to making this one. Thank you so much for sharing this free crochet pattern.
Report Inappropriate Comment
Are you sure you would like to report this comment? It will be flagged for our moderators to take action.
Thank you for taking the time to improve the content on our site.