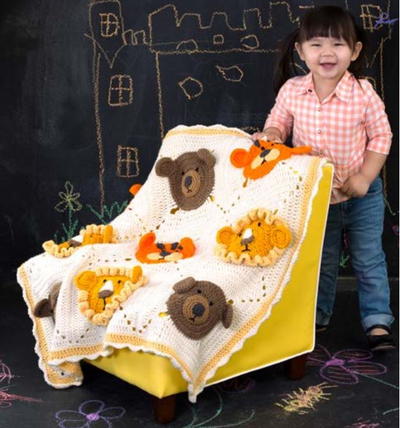
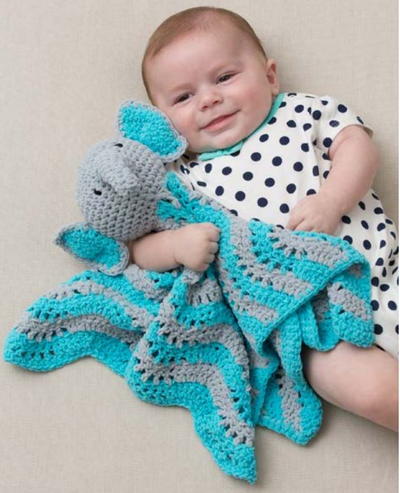
Sock Monkey Crochet Baby Blanket Pattern
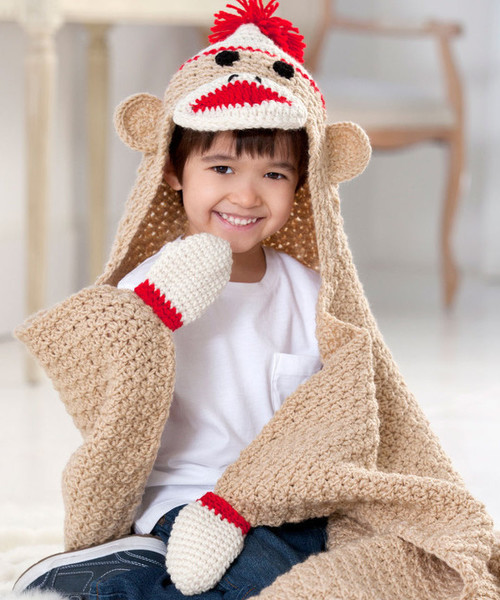
The sock monkey is probably one of the most classic toys out there, loved by grandparents and parents worldwide. Now you can recreate this classic toy in a crochet baby blanket! The Sock Monkey Crochet Baby Blanket Pattern is totally unique and absolutely adorable. With a sock monkey head hood, and little mittens for little monkey arms, this crochet baby blanket pattern will instantly become the apple of every child's eye. Learn how to crochet a baby blanket based off the always classic toy with this printable pattern.

Crochet HookJ/10 or 6 mm hook
Yarn Weight(4) Medium Weight/Worsted Weight and Aran (16-20 stitches to 4 inches)
Materials:
- RED HEART® “Super Saver®”: 5 skeins 334 Buff A, 1 skein each 319 Cherry Red B, 313 Aran C, 312 Black D.
- Crochet Hook: 6mm [US J-10].
- Yarn needle
Measurements: Blanket measures 44” wide x 44” long.
Gauge: 5½ V-sts = 4”; 12 rows = 4”. CHECK YOUR GAUGE. Use any size hook to obtain the gauge.
Special Stitches:
- V-st = (Sc, ch 1, sc) in indicated stitch or space.
- sc2tog = [draw up a loop in next st] twice, yarn over and draw through all 3 loops on hook.
Pattern Stitch
V-st Pattern (multiple of 3 sts)
Row 1 (Right Side): Sc in 3rd ch from hook (beginning ch counts as first V-st), *skip next 2 ch, (sc, ch 1, sc) in next ch (V-st made); repeat from * across, turn.
Row 2: Ch 2 (counts as first V-st), sc in ch-1 sp of first V-st, V-st in ch-1 sp of each remaining V-st, V-st in turning ch-2 sp, turn.
Repeat Row 2 for V-st pattern.
Note: To change color, work last st of row until 2 loops remain on hook, drop old color, yarn over with new color and complete st. Fasten off old color.
Instructions
With A, ch 180.
Work in V-st pattern until piece measures 44” from beginning, end with a Right Side row. Do not fasten off.
Note: There should be 60 V-sts in each row.
Edging: Hold piece with Right Side facing, work sc in end of each row across side edge; working across opposite side of foundation ch, work a V-st in ch at base of each V-st across, sc in ch at base of first sc; work sc in end of each row across 2nd side; join with slip st in top of turning ch-2 sp of last row. Fasten off.
Head
Back
Row 1: With Wrong Side of top of blanket facing, skip first 18 V-sts of last row, join A with slip st in ch-1 sp of next V-st, ch 2 (counts as first V-st), V-st in next 23 V-sts, turn; leave remaining sts unworked—24 V-sts.
Row 2: Work Row 2 of V-st pattern.
Rows 3–12: Ch 2 (counts as first V-st), sc in ch-1 sp of first V-st, *V-st in ch-1 sp of next V-st; repeat from * across to turning ch-sp, turn; leave turning ch-sp unworked; change to B in last st of Row 12—14 V-sts.
Row 13: With B, ch 2 (counts as first hdc), hdc in ch-1 sp of first V-st, *hdc in sp between V-sts, hdc in ch-1 sp of next V-st; repeat from * across to turning ch-2 sp, 2 hdc in turning ch-2 sp, turn—28 hdc.
Row 14: Ch 2 (counts as first hdc), skip first hdc, hdc in each remaining hdc across, hdc in top of turning ch; change to C in last st, turn.
Rows 15–20: With C, repeat Row 14.
Rows 21–26: Ch 2 (counts as first hdc), skip first hdc, hdc in each remaining hdc across to turning ch, turn; leave turning ch unworked—22 hdc. Fasten off.
Front
With A, ch 72.
Rows 1 and 2: Work Rows 1 and 2 of V-st pattern—24 V-sts.
Rows 3–26: Work Rows 3–26 of back of head. Fasten off.
Muzzle
Front
With B, ch 17.
Round 1: Slip st in 2nd ch from hook, *slip st in next ch, sc in next 2 ch, hdc in next 2 ch, dc in next 4 ch, hdc in next 2 ch, sc in next 2 ch, slip st in next 2 ch*; working across opposite side of foundation ch, slip st in same ch; repeat from * to *; change to
C in last st, do not join and do not turn, work in continuous rounds—32 sts.
Round 2: With C, [3 sc in next st, hdc in next 5 sts, sc in next 4 sts, hdc in next 6 sts] twice—36 sts.
Round 3: [2 hdc in each of next 3 sts, hdc in next 15 sts] twice—42 sts. Fasten off.
Back
With C, make same as front muzzle. Do not change color. Work entire piece with C.
Ears (Make 2)
With A, ch 3.
Row 1: Work 5 hdc in 3rd ch from hook (beginning ch counts as first hdc), turn—6 hdc.
Row 2: Ch 2 (counts as first hdc), 2 hdc in each st across, 2 hdc in top of beginning ch, turn—12 hdc.
Row 3: Ch 2 (counts as first hdc), hdc in first hdc (increase made), [hdc in next hdc, 2 hdc in next hdc] 5 times, hdc in top of turning ch, turn—18 hdc.
Row 4: Slip st in each hdc across, slip st in top of turning ch. Fasten off.
Eyes (Make 2)
With D, ch 2.
Round 1: Work 6 sc in 2nd ch from hook; join with slip st in first sc. Fasten off.
Pockets (Make 2)
With A, ch 45.
Rows 1 and 2: Work Rows 1 and 2 of V-st pattern—15 V-sts.
Rows 3–16: Ch 2 (counts as first V-st), sc in ch-1 sp of first V-st, *V-st in ch-1 sp of next V-st; repeat from * across to turning ch-sp, turn; leave turning ch-sp unworked—1 V-st. Fasten off.
Hands (Make 2)
With C, ch 2.
Round 1: Work 5 sc in 2nd ch from hook; do not join and do not turn, work in continuous rounds—5 sc.
Round 2: Work 2 sc in each sc around—10 sc.
Round 3: [2 sc in next sc, sc in next sc] 5 times—15 sc.
Round 4: [2 sc in next sc, sc in next 2 sc] 5 times—20 sc.
Round 5–13: Sc in each sc around.
Round 14: [Sc2tog, sc in next 2 sc] 5 times; change to B in last st—15 sc.
Rounds 15 and 16: Sc in each sc around. Fasten off.
Thumbs (Make 2)
With C, ch 2.
Round 1: Work 6 sc in 2nd ch from hook, do not join and do not turn, work in continuous rounds—6 sc.
Rounds 2–7: Sc in each sc around. Fasten off.
Sew thumbs to hands.
FINISHING
Sew side edges of front of head to back of head. Thread a strand of C through stitches around top of head and pull gently but firmly to close opening, secure and fasten off. With C, make a 3” pompom and tie to top of head. With D, embroider straight stitch nostrils on front muzzle, above mouth. Arrange front and back muzzle, centered over lower edge of front of head. Sew top edges of front and back muzzle to lower edge of front of head. Sew lower edges of front and back muzzle together. Sew eyes to front of head, above muzzle. Sew ears to sides of head, below hat. Arrange pockets over top corners of blanket and sew in place across edges. Sew hands to corners of pockets. Weave in ends.
BONUS! For more crochet baby blankets like this, check out our collection of 30+ Quick and Easy Crochet Baby Blanket Patterns!
Read Next3 Hour Afghan
Your Recently Viewed Projects

Thanks for your comment. Don't forget to share!
Zeemer
Jul 20, 2018
Boys and girls will like this Sock Monkey Crochet Baby Blanket. They can use it in a make believe play with their playmates and pretend to be a monkey. Very cute.
bcorley 3520344
Nov 29, 2014
The instructions for the monkey head are vague when it comes to putting it together. Be prepared to wing it. Grandson loves it, but it was tough to make.
Report Inappropriate Comment
Are you sure you would like to report this comment? It will be flagged for our moderators to take action.
Thank you for taking the time to improve the content on our site.