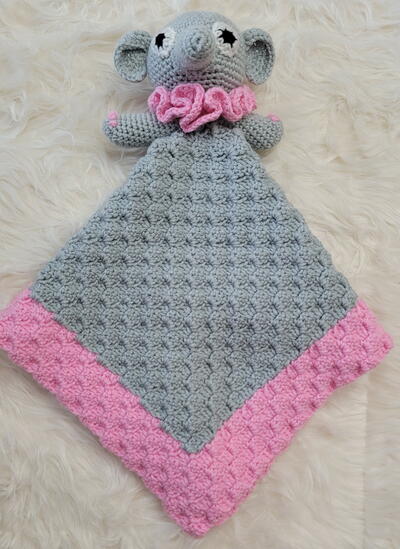
Little Elephant Baby Blanket Crochet Pattern

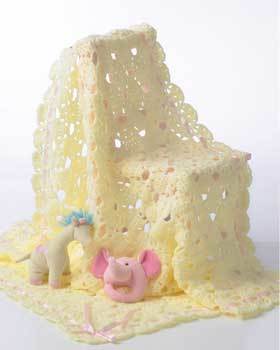
We are seriously in love with this Little Elephant Baby Blanket Crochet Pattern! If you work up this baby afghan as a gift for a baby shower, everyone in the room will "oooh" and "ahh" when the expecting mother opens it.
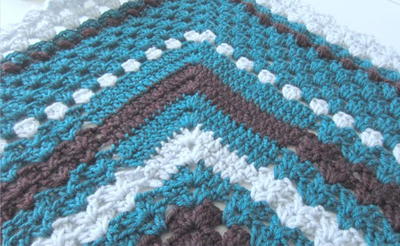
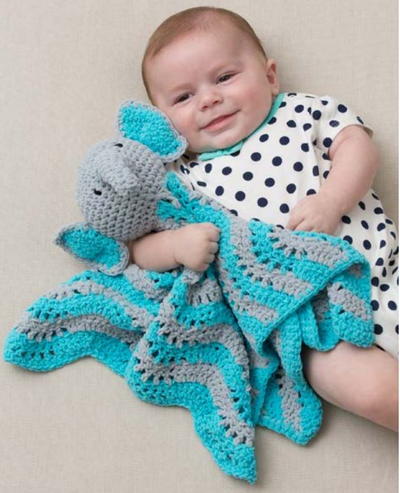
This crochet pattern from Red Heart has a stuffed elephant attached to the blanket, which makes baby want to cuddle up with it all the time. The ripple stitch makes this baby blanket pattern look like it never ends, just like your love for your cute newborn.
NotesNOTES:
1. Blanket is made in a ripple pattern which consists of rows of double crochet "peaks" and "valleys" alternating with rows of single crochet. You may need to work several rows before the ripple is clearly visible.
2. Elephant’s head and trunk are made in continuous rounds with right side facing. Do not join at end of round until instructed.
3. To change color, work last stitch of old color to last yarn over. Yarn over with new color and draw through all loops on hook to complete stitch. Proceed with new color. Do not cut color not in use; carry it on wrong side until next needed.

Crochet HookG/6 or 4 mm hook
Yarn Weight(3) Light/DK (21-24 stitches to 4 inches)
Crochet Gauge1 ripple = 4 (11.5 cm) from peak to peak; 8 rows = 4 (10 cm) in ripple pattern; 5 sc = 1 (4 cm); 4 rows = 1 (2.5 cm) in single crochet. CHECK YOUR GAUGE. Use any size hook to obtain the gauge.
Finished Size17-1/2" x 17-1/2"
Materials List
- RED HEART® Cutie Pie™: 1 ball 503 Splash A and 1 ball 419 Koala B
- Susan Bates® Crochet Hook: 4mm [US G-6]
- Yarn needle
- Stitch marker
- Polyester fiberfill
- Small amount of black embroidery floss
Instructions for BLANKET:
With A, ch 71.
-
Row 1 (right side): Dc in 4th ch from hook (beginning ch counts as first dc), 2 dc in next 2 ch, [skip next ch, dc in next ch] 5 times, *skip next ch, 2 dc in next 6 ch, [skip next ch, dc in next ch] 5 times; repeat from * to last 4 ch, skip next ch, 2 dc in last 3 ch, turn—68 dc.
Row 2: Ch 1, sc in each dc, sc in top of beginning ch; change to B, turn.
Row 3: Ch 3 (counts as first dc here and throughout), dc in first sc, 2 dc in next 2 sc, [skip next sc, dc in next sc] 5 times, *skip next sc, 2 dc in next 6 dc, [skip next sc, dc in next sc] 5 times; repeat from * to last 4 sc, skip next sc, 2 dc in last 3 sc, turn.
Row 4: Ch 1, sc in each dc, sc in top of beginning ch; change to A, turn.
Rows 5–38: Repeat Rows 3 and 4 seventeen times, changing color at the end of every Row 4. Cut B.
Last Round (right side): With A, sc evenly around working 3 sc in each corner; join with slip st in first sc.
Fasten off.
Instructions for ELEPHANT:
Place marker for beginning of rounds and move marker up as each round is completed.
-
Head
Beginning at top of head, with B, ch 2.
Round 1: Work 6 sc in 2nd ch from hook; do not join—6 sc.
Round 2: Work 2 sc in each sc around—12 sc.
Round 3: Sc in next sc, 2 sc in next sc] 6 times—18 sc.
Round 4: [Sc in next 2 sc, 2 sc in next sc] 6 times—24 sc.
Round 5: [Sc in next 3 sc, 2 sc in next sc] 6 times—30 sc.
Round 6: Sc in each sc around.
Round 7: [Sc in next 4 sc, 2 sc in next sc] 6 times —36 sc.
Rounds 8–14: Sc in each sc around.
Round 15: [Sc in next 4 sc, sc2tog] 6 times—30 sc.
Round 16: [Sc in next 3 sc, sc2tog] 6 times—24 sc.
Round 17: Working in back loops only, *sc in next 2 sc, sc2tog; repeat from * around—18 sc.
Round 18: [Sc in next sc, sc2tog] 6 times—12 sc. Stuff head lightly.
Round 19: [Sc2tog] 6 times; join with slip st in first sc—6 sc.
Fasten off, leaving a long tail for sewing. Weave tail through last round and pull stitches closed. Do not cut tail.
Trunk
Beginning at tip of trunk, with B, ch 2.
Round 1: Work 6 sc in 2nd ch from hook; do not join—6 sc.
Round 2: Working in back loops only, sc in each sc around.
Rounds 3–6: Sc in each sc around. Stuff trunk lightly as you go.
Round 7: Work 2 sc in next sc, sc in next 5 sc—7 sc.
Rounds 8 and 9: Sc in each sc around.
Round 10: Work 2 sc in next sc, sc in next 6 sc—8 sc.
Round 11: Work 2 sc in next sc, sc in next 7 sc—9 sc.
Round 12: Work 2 sc in next sc, sc in next 8 sc—10 sc.
Round 13: Work 2 sc in next sc, sc in next 9 sc—11 sc.
Round 14: Sc in next sc, 2 sc in next 4 sc, [sc2tog] 3 times—12 sc.
Round 15: Sc in next 2 sc, 2 sc in next sc, sc in next sc, 2 sc in next sc, sc in next 7 sc; join with slip st in first sc —14 sc.
Fasten off, leaving a long tail for sewing. Finish stuffing lightly.
Ear (make 2 each with A and B)
Ch 6.
Row 1: Sc in 2nd ch from hook and each ch across, turn—5 sc.
Row 2: Ch 1, 2 sc in each sc, turn—10 sc.
Row 3: Ch 1, sc in each sc, turn.
Row 4: Ch 1, sc in first 4 sc, 2 sc in next 2 sc, sc in last 4 sc, turn—12 sc.
Row 5: Ch 1, sc in each sc, turn.
Row 6: Ch 1, sc in first sc, sc2tog, sc in next 6 sc, sc2tog, sc in last sc—10 sc.
Fasten off.
FINISHING
Trunk
Using photograph as a guide, sew trunk to head through last round. Do not cut yarn. Ease needle through trunk and pull tail out through first round. Sew over one stitch at lower end of first round. Ease needle back through trunk and pull tail out at last round. Pull gently to force trunk to curl under to desired curve; secure and cut the tail. With floss, embroider satin stitch eyes.
Ears (work twice)
Row 1: With wrong sides of A and B ear
held together, working through both thicknesses, join B with sc in opposite side of last foundation ch, sc in end of each row of first side, 3 sc in first sc, sc in each sc to last sc, 3 sc in last sc, sc in end of each row of other side, sc in opposite side of first ch. Fasten off, leaving a long tail for sewing. Whipstitch remaining foundation ch together and sew this edge to side of head.
Working through unworked front loops only of Round 17, sew head to center of blanket. Weave in ends.
Abbreviations
- (SPECIAL) sc2tog
- [Insert hook in next stitch, yarn over and pull up a loop] twice, yarn over and draw through all 3 loops on hook.
- (SPECIAL) Join with sc
- Place a slip knot on hook, insert hook in indicated stitch, yarn over and draw up a loop, yarn over and draw through both loops on hook.
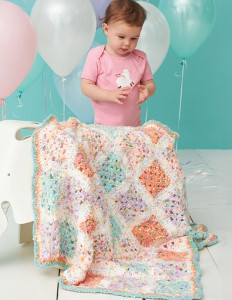
Read NextBirthday Cake Baby Blanket
Your Recently Viewed Projects
Thanks for your comment. Don't forget to share!
Camil
Nov 21, 2018
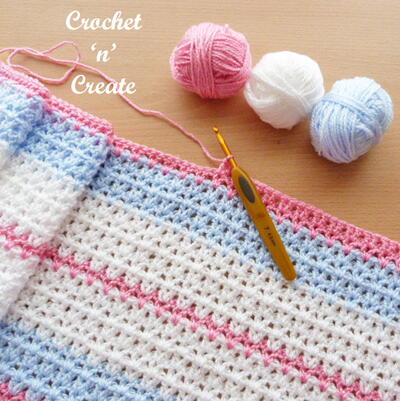
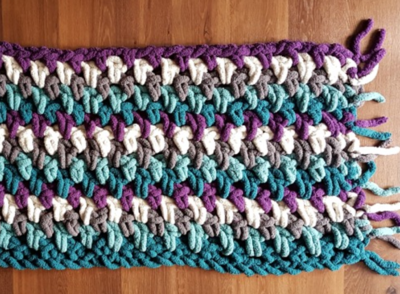
Can't resist a baby blanket. Here is my version of your Little Elephant Baby blanket
AFCAP Editor
Dec 20, 2018
YES!! Love love love! Have you posted this on social media and tagged @AFCAP so we know where to find you and like the post? Great example of how color choice can truly make a blanket your own! Beautiful!! ) Thank you for the feedback! - Jaji Hammer, AFCAP Editor
bunnyrabbit572004 5569892
May 25, 2017
can't download the file to my computer...won't complete the download
KLC
May 25, 2017
Hi! I'm not sure how you are trying to "download" this but the best way is to hit the PRINT button at the top of the page and choose "Save as a PDF" if you have the option. If you are still having trouble, please let me know and I will try to assist further. Thanks, Krista, Editor
Report Inappropriate Comment
Are you sure you would like to report this comment? It will be flagged for our moderators to take action.
Thank you for taking the time to improve the content on our site.