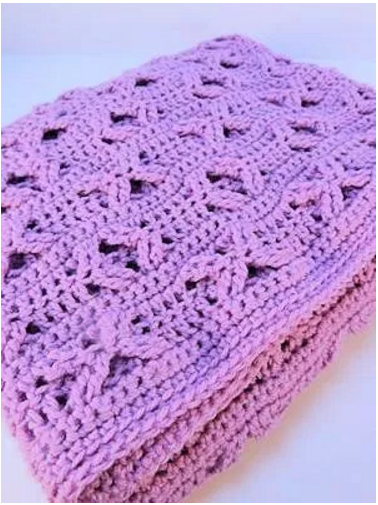
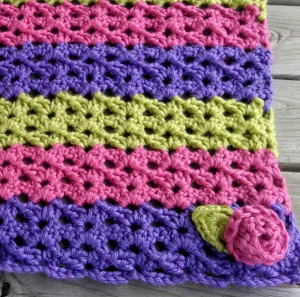
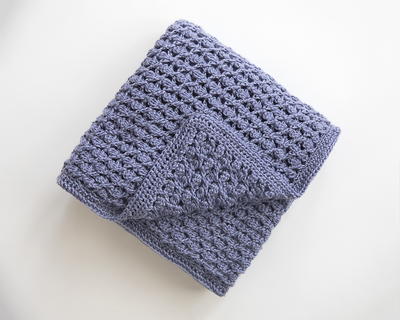
Picadilly Baby Blanket
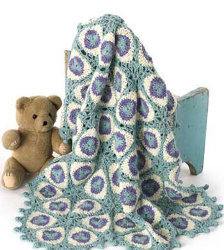
Pick up your hook and crochet the Picadilly Baby Blanket for the next baby shower on your calendar. Spunky purple and blue crochet motif patterns are joined together to make the interlocking flower shapes that make this blanket truly unique. The bobble stitch used in this tutorial is a way to make this crochet baby blanket extra puffy so that it feels super soft against baby's cheek. Best of all, you don't have to be a crochet master to make this blanket. In fact, it's easy.

Crochet HookH/8 or 5 mm hook
Yarn Weight(4) Medium Weight/Worsted Weight and Aran (16-20 stitches to 4 inches)
Materials:
- Caron Simply Soft Yarn
- 9 oz 005 Ocean Spray (A)
- 3 oz 006 Berry Frappe (B)
- 6 oz 007 Naturally (C)
- Size-8 crochet hook
- Yarn needle
Size: 34" x 30"
Gauge: Motif = 5" measured along one side.
Special Stitch
Bobble: Ch 2, yarn over, insert hook in second ch from hook, yarn over and draw up a loop, yarn over and draw through 2 loops on hook (2 loops on hook), [yarn over insert hook in same ch, yarn over and draw up a loop, yarn over and draw through 2 loops on hook (1 additional loop on hook)] 5 times, yarn over and draw through all loops on hook. Gently push bobble to RS, slip st in same ch.
Instructions:
Notes
1. Each motif is worked in the round with the RS facing. After first motif, each remaining motif is joined following assembly diagram as the last round is worked. Do not join the center ch-2 space at points of motifs.
2. Country is a strong 6-ply yarn: To reduce bulk and to make knots more secure, before tying knots separate the tail into two 3-ply section by twisting yarn in the opposite direction from which it was spun, pull one 3-ply section through a nearby 6-ply stitch and tie the two 3-ply section together tightly. Weave this tail through four consecutive back loops of the round just completed. After the next round is worked, encasing the yarn tails, trim off any excess.
Motif (66)
First Motif
With A, chain 4; join with slip st in first ch to form a ring.
Round 1 (RS): Ch 1, *(sc, hdc, dc, tr, dc, hdc) in ring (clover-shaped leaf made); repeat from * 2 more times; join with slip st in first sc, changing to B—3 clover-shaped leaves. Fasten off.
Round 2: With B, ch 4 (counts as tr here and throughout), 2 dc in next hdc, hdc in next dc, sc in next tr, hdc in next dc, 2 dc in next hdc, *tr in next sc, 2 dc in next hdc, hdc in next dc, sc in next tr, hdc in next dc, 2 dc in next hdc; repeat from * once more; join with slip st in top of beginning ch-4, changing to C. Fasten off.
Round 3: With C, ch 1, *sc in next tr, hdc in next 2 dc, 2 dc in next hdc, 3 tr in next sc (point made), 2 dc in next hdc, hdc in next 2 dc; repeat from * 2 more times; join with slip st in first sc, changing to A. Fasten off.
Round 4: With A, ch 1, *sc in next sc, sc in next hdc, ch 1, skip next hdc, hdc in next dc, dc in next dc, ch 1, skip next tr, (2 tr, ch 2, 2 tr) in next tr, ch 1, skip next tr, dc in next dc, hdc in next dc, ch 1, skip next hdc, sc in next hdc; repeat from * 2 more times; join with slip st in first sc. Fasten off.
Joined Motifs
Repeat Rounds 1–3 of First Motif.
Note: For each joining on next round, hold adjoining edge of previous Motif (see assembly diagram) next to edge of current Motif, slip st in corresponding ch-1 spaces on adjoining edge instead of making a ch-1 as you work the next round.
Round 4: With A, ch 1, *sc in next sc, sc in next hdc, ch 1, skip next hdc, hdc in next dc, dc in next dc, ch 1, skip next tr, (2 tr, ch 2, 2 tr) in next tr, ch 1, skip next tr, dc in next dc, hdc in next dc, ch 1, skip next hdc, sc in next hdc; repeat from * 2 more times; join with slip st in first sc. Fasten off.
Fill Motifs (23)
With A, ch 4; join with slip st in first ch to form a ring.
Round 1: Ch 1, work 6 sc in ring; join with slip st in first sc.
Round 2: Place Round 1 in space at center of six Joined Motifs and align sc of Round 1 with the six center ch-2 spaces at the points. Inserting hook in sc of Round 1 and in corresponding ch-2 space of Joined Motifs at the same time, slip st in each sc around; join with slip st in first slip st. Pull beginning tail through center of Fill Motif and tie with ending tail to make a tuft.
Border
Note: When working the Border, use stitches that have not been worked into. Joining stitches that form a seam between Motifs are not worked into.
Join A with slip st in any stitch along outside edge of blanket.
Round 1: Ch 1, sc in same stitch as join, skip next 2 sts, *(3 dc, bobble, 3 dc) in next st, skip next 2 sts, sc in next st, skip next 2 sts; repeat from * around outside edge, end with (3 dc, bobble, 3 dc) in next st, skip next 2 sts; join with slip st in first sc.
Fasten off. Using yarn needle, weave in ends.
Read NextLilac Love Crochet Baby Blanket
Your Recently Viewed Projects
Thanks for your comment. Don't forget to share!
Zeemer
Sep 15, 2018
Another beautiful piece added to my baby blanket collection. It's a little tedious to make because of those many pieces to make and assemble but I think it's worth it. Perfect christening or baby shower gift.
Report Inappropriate Comment
Are you sure you would like to report this comment? It will be flagged for our moderators to take action.
Thank you for taking the time to improve the content on our site.