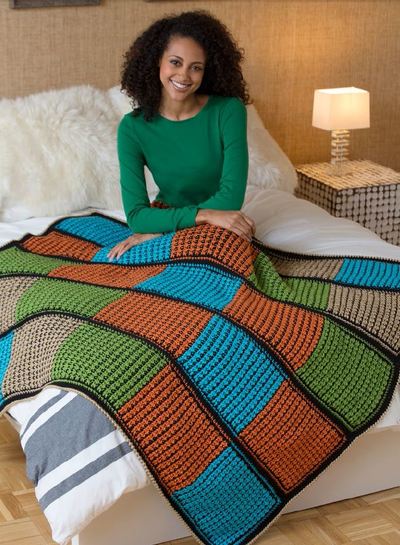
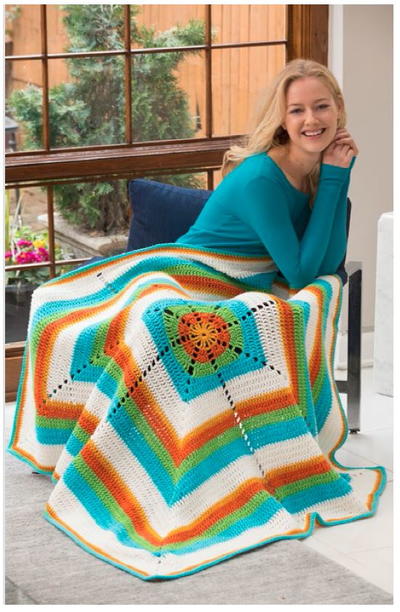
The Modern Hippie Daisy Throw
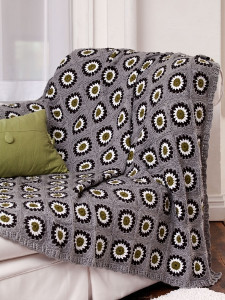
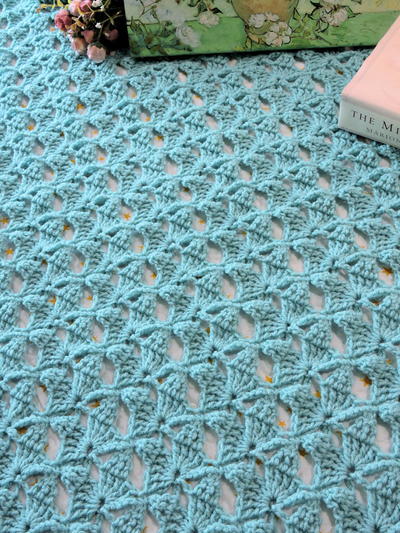
When it comes to free crochet afghan patterns, The Modern Hippie Daisy Throw is one of the most stylish. This blanket takes a classic design and gives it a trendy twist. Using the V-Stitch technique, this crochet afghan takes a vintage daisy pattern and makes it look effortlessly modern. The beautifully intricate stitching will offer a unique look to any space. The fresh daisy design makes this throw the best crochet afghan to lounge with on a spring evening. Pick up your hook and start crocheting your way back to the 60s!

Crochet HookH/8 or 5 mm hook
Yarn Weight(4) Medium Weight/Worsted Weight and Aran (16-20 stitches to 4 inches)
Materials:
- Simply Soft (170 g/6. oz; 288m/315 yds) Contrast A, Contras B: White (9701) - 2; Contrast C: Black (9727) - 3; Contrast D - 7
- Tapestry needle
Size: Throw measures approximately 56"/142 cm wide x 61"/155 cm
Gauge: One block measures about 43/4 x 43/4"/12 x 12 cm. Gauge is not critical for this project.
Abbreviations: Dc= double crochet, V - st = V - stitch, Dc3tog = (Yoh and draw up a loop in next st. Yoh and draw through two loops on hook 3 times. Yoh and draw through all loops on hook.), dcbp = Yoh and draw up a loop around post of next st at back of work inserting hook from right to left. (Yoh and draw through 2 loops on hook) twice - 1 dcbp made, dcfp = Yoh and draw up a loop around post of next st at front of work insterting hook from right to left (Yoh and draw through 2 loops on hook) twice - 1 dcfp made
INSTRUCTIONS:
Notes: Throw is made from 132 blocks, arranged into 12 rows of 11 blocks each. Blocks are worked with RS facing throughout. Do not turn at the ends of rounds.
BLOCK (make 132): With A, ch 6; sl st in first ch to form a ring.
Round 1 (RS): Ch 3 (counts as first dc here and throughout), work 15 more dc in ring; join with sl st in top of beginning ch — 16 dc. Fasten off.
Round 2: With RS facing, join B with sl st in any dc, ch 3, dc in same dc, 2 dc in each remaining dc around; join with sl st in top of beginning ch — 32 dc. Fasten off.
Round 3: With RS facing, join C in any sp between two 2 - dc groups, ch 3, 2 dc in same sp, 3 dc in each sp between 2 - dc groups around; join with sl st in top of beginning ch — 48 dc. Fasten off.
Round 4: With RS facing, join D with sc in any sp between two 3 - dc groups, ch 3, * sc in next sp between 3 - dc groups, ch 3; repeat from * around; join with sl st in first sc — 16 sc and 16 ch - 3 sps. Do not fasten off.
Round 5: With D, sl st in next ch - 3 sp, ch 2 (counts as hdc), 2 hdc in same ch - 3 sp, * 3 dc in next ch - 3 sp, (4 tr, ch 1, 4 tr) in next ch - 3 sp, 3 dc in next ch - 3 sp, 3 hdc in next ch - 3 sp; repeat from * 2 more times, 3 dc in next ch - 3 sp, ( 4 tr, ch 1, 4 tr) in next ch - 3 sp, 3 dc in next ch - 3 sp; join with sl st in top of beginning ch. Fasten off.
FINISHING:
With RS facing, arrange blocks into 12 rows of 11 blocks each. With D, whipstitch blocks together.
Border:
Round 1: With RS facing, join D with sl st in any corner ch - 1 sp, ch 3, 2 dc in same ch - 1 sp, {* dc in next tr, sk next tr, V - st in next tr, sk next tr, [dc in next 3 sts, sk next st, V - st in next st, sk next st] twice, dc in next tr, work dc 3 tog working first leg in next ch - 1 sp, 2nd leg in seam between blocks, and 3rd leg in following ch - 1 sp; repeat from * to next corner block, dc in next tr, sk next tr, V - st in nexttr, sk next tr, [dc in next 3 sts , sk next st, V - st in next st, sk next st] twice, dc in next tr **, 3 dc in corner ch - 1 sp}; repeat between {and} 3 more times, ending last repeat at **; join with sl st in top of beginning ch.
Round 2: Ch 4, 5 tr in next dc, tr in next dc, {*FPd around next dc, V - st in ch - sp of next V - st, [FPdc around next dc, BPdc around next dc, FPdc around next dc, V - st in ch - sp of next V - st] twice, FP dc around next dc, BP tr around next dc 3 tog; repeat from * to next corner block, FPdc around next dc, V - st in ch - sp of next V - st, [FPdc around next dc, BPdc around next dc, FPdc around next dc, V - st in ch - sp of next V - st] twice, FPdc around next dc **, tr in next dc, 5 tr in next dc, tr in next dc}; repeat between {and} 3 more times, ending last repeat at **; join with sl st in top of beginnig ch.
Round 3: Ch 3, {FPdc around next tr, dc in next tr, 3 dc in next tr, dc in next tr, FPdc around next tr, dc in next tr, FPdc around next FPdc, 3 dc in ch - sp of next V - st, * FPdc around next st, BPdc around next st, FPdc around next st, 3 dc in ch - sp of next V - st; repeat from * across to last FPdc before next corner, FPdc around next FPdc **, dc in next tr}; repeat between {and} 3 more times, ending last repeat at **; join with sl st in top of beginning ch. Fasten off. Using yarn needle weave in all ends.
Read NextHoney Peaks Throw
Your Recently Viewed Projects
Thanks for your comment. Don't forget to share!
Zeemer
Apr 27, 2018
Modern Hippie. I thought the floral design is like the 70s hippie that is vibrant and colorful but it's actually the opposite. Drab and cold.
Report Inappropriate Comment
Are you sure you would like to report this comment? It will be flagged for our moderators to take action.
Thank you for taking the time to improve the content on our site.