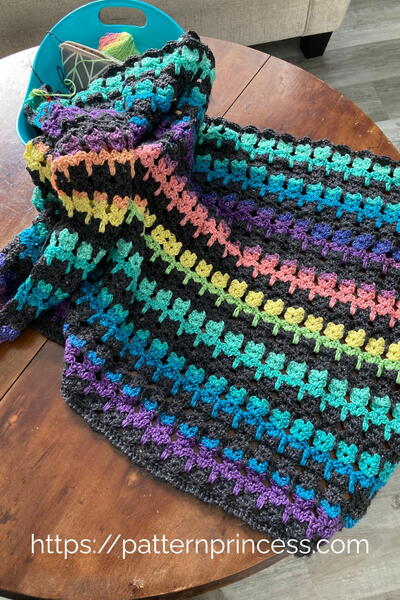
Color Burst Easy Crochet Pattern
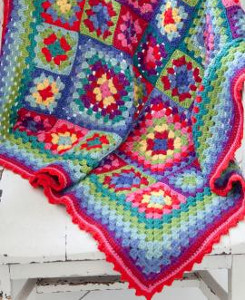
Nothing says bold like this Color Burst Easy Crochet Pattern. If you don't know how to crochet a blanket, this descriptive tutorial will make the process much easier for you. This blanket is the perfect vibrant accent piece for rooms that are lacking in the color department. Even though the technique is basic, this throw will have all your friends in awe when they see it. These bursts of color will be perfect for spring and summer.

Crochet HookH/8 or 5 mm hook
Yarn Weight(4) Medium Weight/Worsted Weight and Aran (16-20 stitches to 4 inches)
Materials:
- STITCH NATION by Debbie Stoller™ “Bamboo Ewe™” 1 ball each of 5520 Eucalyptus A; 5529 Mermaid B; 5625 Sprout C; 5510 Beach Glass D: 5830 Periwinkle E; 5875 Twilight F; 5560 Grape G; 5910 Lipstick H; 5280 Geranium I; 5705 Snapdragon J; 5230 Buttercup K.
- Crochet Hook: 5 mm [US H-8]
- Yarn needle
Size: Throw is 38” x 38”
Gauge/Tension: In (3 dc cluster, ch 1) patt: 20 st = 4½”, 8 rows = 3½”. CHECK YOUR GAUGE. Use any size hook to obtain the gauge.
Abbreviations: A, B, C, D, E, F, G, H, I, J, K = color A, B, C, D, E, F, G, H, I, J, K; ch = chain; dc= double crochet; mm = millimeters; sc = single crochet; st(s) = stitch (es); slip st = Slip Stitch; [] = work directions in brackets the number of times specified; * or ** = repeat whatever follows the * or ** as indicated.
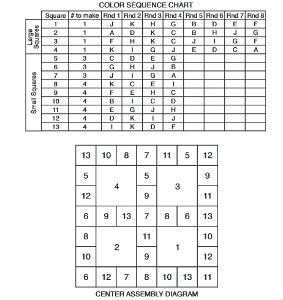
LARGE SQUARE: (make 4 following Color Sequence Chart for colors):
With first color, ch 4; join with slip st in first ch to form ring.
Round 1 (right side): Ch 5 (counts as dc, ch 2 here and throughout), [3 dc, ch 2] 3 times in ring, 2 dc in ring, join with a slip st in 3rd ch of beginning ch-5. Fasten off.
Round 2: With right side facing, join next color in any corner ch-2 space, ch 5, 3 dc in same ch-2 space, *ch 1, (3 dc, ch 2, 3 dc) in next ch-2 space; repeat from * twice, work 2 dc in same space as 5 ch at beginning of round; join with a slip st in 3rd ch of beginning ch-5.
Round 3: With right side facing, join next color in any corner ch-2 space, ch 5, 3 dc in same ch-2 space, *ch 1, 3 dc in next ch-1 space, ch 1, (3 dc, ch 2, 3 dc) in next ch-2 space; repeat from * twice, ch 1, 3 dc in next ch-1 space, ch 1, work 2 dc in same space as 5 ch at beginning of round; join with a slip st in 3rd ch of beginning ch-5.
Round 4: With right side facing, join next color in any corner ch-2 space, ch 5, 3 dc in same ch-2 space, *(ch 1, 3 dc) in each ch-1 space across to next corner, ch 1, (3 dc, ch 2, 3 dc) in next ch-2 space; repeat from * twice, (ch 1, 3 dc) in each ch-1 space across to next corner, ch 1, work 2 dc in same space as 5 ch at beginning of round; join with a slip st in 3rd ch of beginning ch-5.
Rounds 5-8: Repeat Round 4. Fasten off.
SMALL SQUARE (make 33 following Color Sequence Chart for colors):
Work same as Large Square through Round 4. Fasten off.
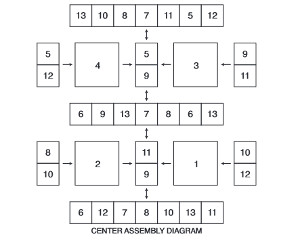
ASSEMBLY: With right sides facing, with yarn needle and A, working through back loops of sts, whip st or sc squares together following Assembly Diagram.
BORDER:
Round 1: With right side facing, join B in any corner ch-2 space, ch 5, work 3 dc in same ch-2 space, ch 1, **(3 dc, ch 1) in each ch-1 space across to next joined ch-2 space, *dc in next ch-2 space, dc2tog over same ch-2 space and next ch-2 space, dc in same ch-2 space as last leg of dc2tog, (3 dc, ch 1) in each ch-1 space across to next ch-2 space; repeat from * across to next corner**, (3 dc, ch 2, 3 dc) in next corner ch-2 space, repeat from ** twice; repeat from ** to ** once, work 2 dc in same space as 5 ch at beginning of round; join with a slip st in 3rd ch of beginning ch-5.
Round 2: Slip st in next ch-2 space, ch 5, 3 dc in same ch-2 space, *(ch 1, 3 dc) in each ch-1 space across to next corner, ch 1, (3 dc, ch 2, 3 dc) in next ch-2 space; repeat from * twice, (ch 1, 3 dc) in each ch-1 space across to next corner, ch 1, work 2 dc in same space as 5 ch at beginning of round; join with a slip st in 3rd ch of beginning ch-5. Fasten off B.
Round 3: With right side facing, join C in next ch-2 space, ch 5, 3 dc in same ch-2 space, *(ch 1, 3 dc) in each ch-1 space across to next corner, ch 1, (3 dc, ch 2, 3 dc) in next ch-2 space; repeat from * twice, (ch 1, 3 dc) in each ch-1 space across to next corner, ch 1, work 2 dc in same space as 5 ch at beginning of round; join with a slip st in 3rd ch of beginning ch-5.
Rounds 4-9: Repeat Round 2, working in the following color sequence: 1 more round C; 2 rounds D; 2 rounds E; and 1 round G.
Round 10: With right side facing, join H in any corner ch-2 space, ch 3, dc in same ch-2 space, *working in back loops only, dc in each st across to next corner ch-2 space**, (2 dc, ch 2, 2 dc) in corner ch-2 space; repeat from * twice; repeat from * to ** once, work 2 dc in same space as 5 ch at beginning of round; join with a slip st in 3rd ch of beginning ch-3. Fasten off H.
Round 11: With right side facing, join J in any corner ch-2 space, ch 1, *(2 sc, ch 1, 2 sc) in corner ch-2 space, sc in each dc across to next corner ch-2 space; repeat from * around; join with slip st in first sc. Fasten off J.
Round 12: With right side facing, join I in any corner ch-2 space, ch 1, *(sc, ch 1, sc) in corner ch-1 space, sc in each sc across to next corner ch-1 space; repeat from * around, join with slip st in first sc. Fasten off I.
Round 13: Slip st in next sc, *(sc, ch 2, sc) in next st, slip st in each of next 3 sts; repeat from * around; join with slip st in first slip st. Fasten off I. Weave in ends.
FINISHING: The finished blanket will almost certainly need blocking, and the Bamboo Ewe yarn responds beautifully to this finishing technique. Begin from the central square and pin outwards, straightening and realigning the squares as you go. Finally, pin around the outside edge to achieve a neat, straight finish. Spray with a fine mist of tepid water and leave to dry completely.
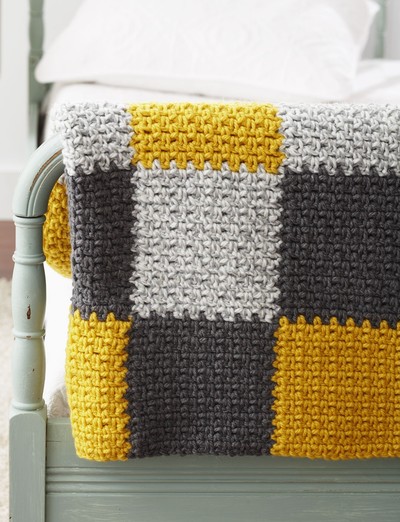
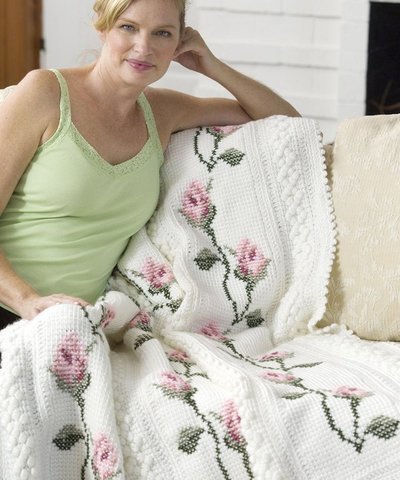
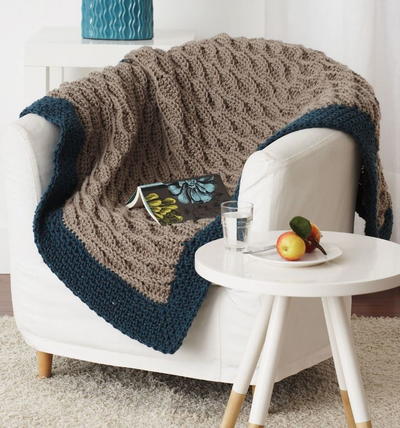
Read NextRosebud Throw
Your Recently Viewed Projects
Thanks for your comment. Don't forget to share!
lcarr
Jun 28, 2017
I really like this throw. It is so colourful and it looks simple to make. I love that there are different sized squares, and the granny square border really adds to it. This one will be going on my to do list. I think it would look great on the back of the couch.
Zeemer
Jun 24, 2017
Winter will not be so gloomy with this Color Burst Easy Crochet Pattern. The various vibrant colors used in making this afghan compensate for the gloomy atmosphere of winter. This is the kind of afghan pattern which is perfect to place on your sofa or couch to give any room a bright and happy atmosphere. Thanks for the pattern which has clear instructions and appropriate diagram. Cheers.
Report Inappropriate Comment
Are you sure you would like to report this comment? It will be flagged for our moderators to take action.
Thank you for taking the time to improve the content on our site.