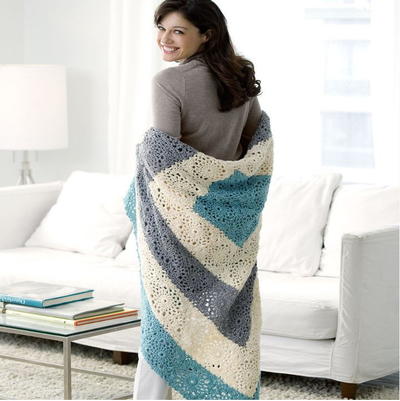
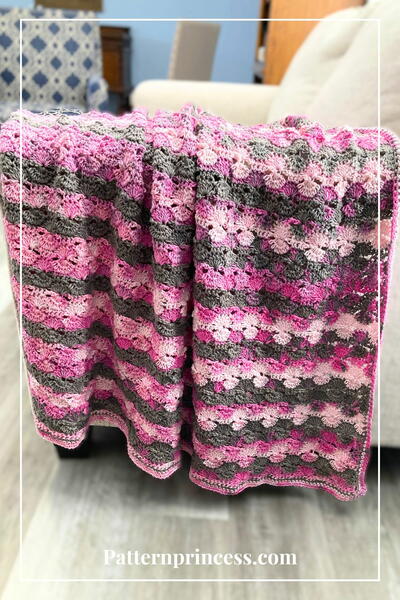
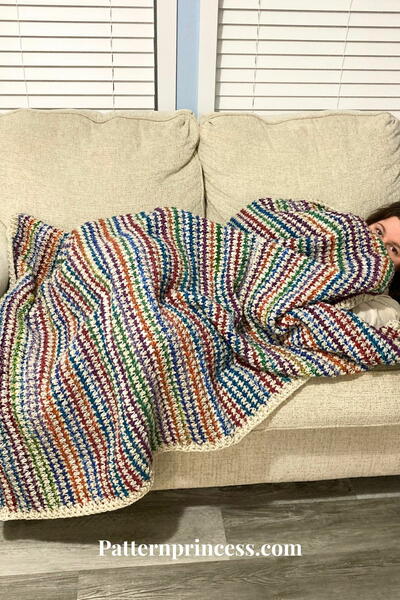
Blueberry Mornings Basketweave Crochet Afghan & Pillow

Wake up the smart way - wrapped in a Blueberry Mornings Basketweave Crochet Afghan & Pillow. This crochet basketweave pattern is as juicy as some plump blueberries. With a variety of different crochet stitches, this blanket has an amazing texture. Each panel of this afghan has its own special design.
From diamonds to cable, a blanket like this doesn't come around very often. With this crochet basketweave pattern you can also make something for your head! If you're looking for crochet pillow patterns, why not make one to match this amazing blanket?

Crochet HookI/9 or 5.5 mm hook, J/10 or 6 mm hook
Yarn Weight(4) Medium Weight/Worsted Weight and Aran (16-20 stitches to 4 inches)
Crochet Gauge14 sts = 4" in single crochet with larger hook. CHECK YOUR GAUGE. Use any size hook to obtain the gauge.
Finished SizeThrow: 45" x 55" Pillow: 18" x 18"
Materials List
- RED HEART® With Love®: 10 skeins 1814 True Blue. Note: Throw requires 7 skeins, pillow requires 3
- Crochet hooks: 6mm [US J-10] and 5.5mm [US I-9]
- 18" x 18" pillow form
- Yarn needle
Instructions for THROW:
NOTES:
Throw is worked in one piece, from one long edge across to other long edge.
Smaller hook is used to work Center Basketweave Diamond Pattern. All other sections of the throw and pillow are worked with the larger hook.
-
With larger hook, ch 153.
Row 1 (Wrong Side): Sc in 2nd ch from hook and in each ch across, turn—152 sts.
Front Ridge
Note: Both rows of the front ridge are worked into the sts of the same previous row. The first row (Row 2) is worked into the front loops only. The piece is turned and the next row (Row 3) is worked into the free loops of the same row (the free loops are in the front after the piece is turned).
Row 2 (Right Side): Ch 1, working in front loops only, slip st in each sc across, turn.
Row 3: Ch 1, working in free loops of sts of previous row, sc in each sc across, turn. -
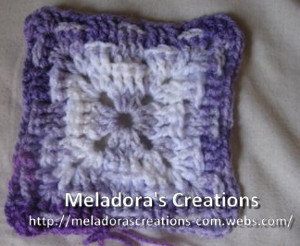
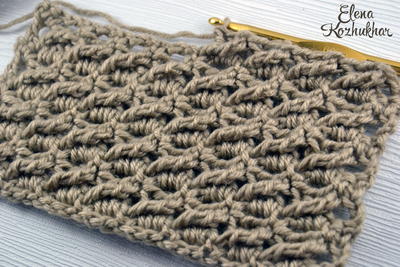
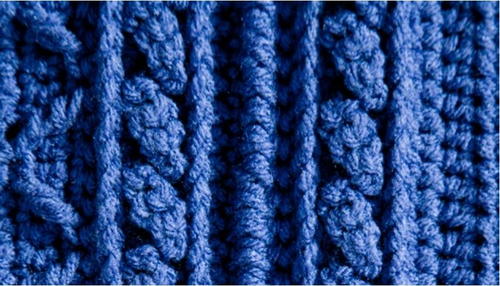
Cable Pattern (see image below for detail)
Row 4: Ch 1, sc in first sc, *ch 3, skip next 2 sc, sc in next sc, TURN and work sc in each ch of the ch-3 just made, sl st in the next sc (one cable made), TURN; working behind the cable, sc in each of the 2 skipped sc, skip the sc that was made after the ch-3; repeat from * across to last sc, sc in last sc, turn—50 cables.
Note: In the next row, you will work a sc in the first and last st, and 3 sc evenly spaced behind each cable (on Wrong Side). The 3 sc behind each cable are worked into the sc that were worked into the 2 skipped sc. Work sc in one of these skipped sc and 2 sc into the other. Do not work into the sc of the cables. Push the cables towards the Right Side of the throw as you work.
Row 5 (Wrong Side): Ch 1, sc in first sc, *sc in next sc, 2 sc in next sc; repeat from * across to last sc, sc in last sc, turn—152 sc.
Front Ridge
Rows 6 and 7: Repeat Rows 2 and 3. -
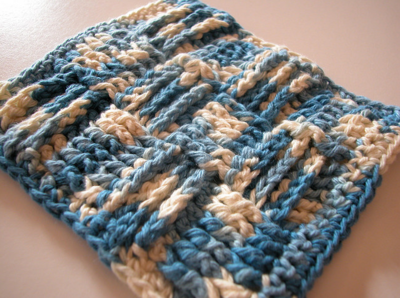
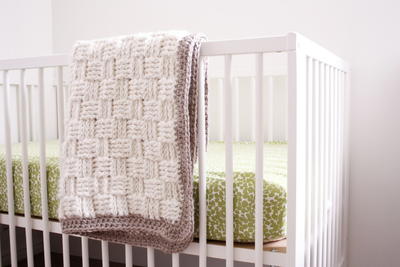
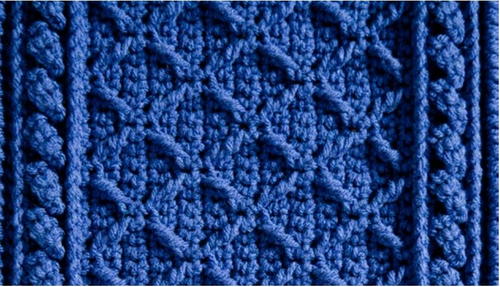
Basketweave Pattern (see image below for detail)
Rows 8–10: Ch 2 (counts as first hdc here and throughout), skip first sc, *Fpdc around each of next 3 sts, Bpdc around each next 3 sts; repeat from * across to last st, hdc in last st, turn.
Rows 11–13: Ch 2, skip first sc, *Bpdc around each of next 3 sts, Fpdc around each next 3 sts; repeat from * across to last st, hdc in last st, turn.
Rows 14–16: Repeat Rows 8–10.
Row 17: Ch 1, sc in each st across, turn.
Second Set of Front Ridges and Cable Pattern
Rows 18–23: Repeat Rows 2–7.
Row 24: Ch 1, sc in each st across, DO NOT TURN. -
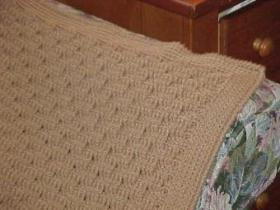
Knurl Ridge (see image below for detail)
Row 25: Ch 1, working in front loops only, work knurl st in each st across, DO NOT TURN.
Row 26: Ch 1, working in the free back loops of Row 24 (behind the knurl sts), sc in each sc across, turn.
Row 27 (Wrong Side): Ch 1, sc in each st across, turn.
Third Set of Front Ridges and Cable Pattern
Rows 28–33: Repeat Rows 2–7. -
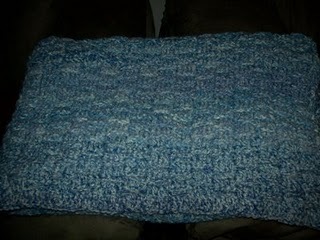
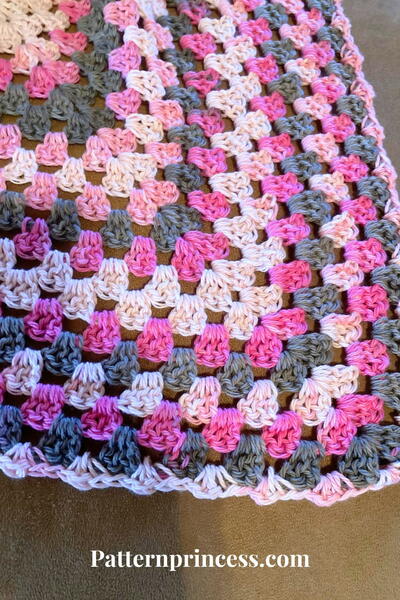
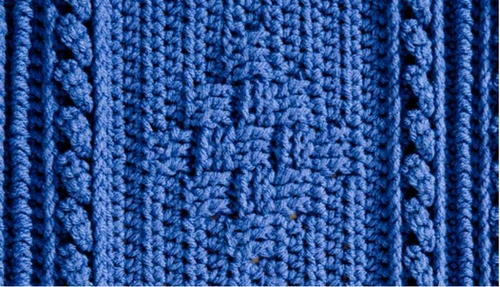
Diamond Pattern (see image below for detail)
Rows 34 and 35: Ch 1, sc in each st across, turn.
Notes: In the following rows, stitches are worked into the usual row (1 row below row being made) and around stitches 3 rows below. Unless otherwise stated, work and skip stitches in the usual row. Only work or skip stitches 3 rows below when instructed.
Row 36 (Right Side): Ch 1, sc in first st, Fptr around 4th sc 3 rows below, skip next st (behind the Fptr), sc in next 4 sc, Fptr around next sc 3 rows below (next to the last Fptr worked), *skip next 4 sc 3 rows below, Fptr around next sc 3 rows below, skip next 2 sc (behind the 2 Fptr sts), sc in next 4 sc, Fptr around next sc 3 rows below; repeat from * across to last 2 sts, skip next st (behind the last Fptr), sc in last st, turn.
Rows 37–39: Ch 1, sc in each st across, turn.
Row 40: Ch 1, sc in first 3 sts, Fptr around 2nd sc 3 rows below (directly above Fptr of previous Fptr row), skip next 4 sc 3 rows below, Fptr around next sc 3 rows below, skip next 2 sts, *sc in next 4 sts, Fptr around next sc 3 rows below (next to the last Fptr worked), skip next 4 sc 3 rows below, Fptr around next sc 3 rows below, skip next 2 sts; repeat from * across to last 3 sts, sc in last 3 sts, turn.
Row 41: Ch 1, sc in each st across, turn.
Rows 42–57: Repeat Rows 34–41 twice.
Rows 58–73: Repeat Rows 18–33.
Center Basketweave Diamond Pattern
Change to smaller hook.
Rows 74 and 75: Ch 2 (counts as first hdc here and throughout), skip first st, hdc in each st across, turn.
Row 76 (Right Side): Ch 2, skip first st, hdc in next 11 sts, Fpdc around each of next 3 hdc, *hdc in next 18 sts, FPdc around each of next 3 sts; repeat from * across to last 11 sts, hdc in last 11 sts, turn.
Row 77: Ch 2, skip first st, hdc in next 10 sts, Bpdc around each of next 3 sts, *hdc in next 18 sts, Bpdc around each of next 3 sts; repeat from * across to last 12 sts, hdc in last 12 sts, turn.
Row 78: Ch 2, skip first st, hdc in next 8 sts, Fpdc around each of next 3 sts, Bpdc around each of next 3 sts, Fpdc around each of next 3 sts, *hdc in next 12 sts, Fpdc around each of next 3 sts, Bpdc around each of next 3 sts, Fpdc around each of next 3 sts; repeat from * across to last 8 sts, hdc in last 8 sts, turn.
Row 79: Ch 2, skip first st, hdc in next 7 sts, Bpdc around each of next 3 sts, Fpdc around each of next 3 sts, Bpdc around each of next 3 sts, *hdc in next 12 sts, Bpdc around each of next 3 sts, Fpdc around each of next 3 sts, Bpdc around each of next 3 sts; repeat from * across to last 9 sts, hdc in last 9 sts, turn.
Row 80: Ch 2, skip first st, hdc in next 5 sts, [Fpdc around each of next 3 sts, Bpdc around each of next 3 sts] 2 times, Fpdc around each of next 3 sts, *hdc in next 6 sts, [Fpdc around each of next 3 sts, Bpdc around each of next 3 sts] 2 times, Fpdc around each of next 3 sts; repeat from * across to last 5 sts, hdc in last 5 sts, turn.
Row 81: Ch 2, skip first st, hdc in next 4 sts, *[Bpdc around each of next 3 sts, Fpdc around each of next 3 sts] 2 times, Bpdc around each of next 3 sts, hdc in next 6 sts; repeat from * across, turn.
Rows 82 and 83: Repeat Rows 78 and 79.
Rows 84 and 85: Repeat Rows 76 and 77.
Rows 86 and 87: Ch 2, skip first st, hdc in each st across, turn.
Change to larger hook.
Rows 88–143: Repeat Rows 18–73.
Rows 144–153: Repeat Rows 8–17.
Rows 154–159: Repeat Rows 2–7.
Do not fasten off. -
Finishing
Border
Row 1 (Right Side): Ch 1, sc in each st across, DO NOT TURN.
Row 2: Ch 1, knurl st in each st across, taking care to work under both loops of each st, TURN.
Row 3 (Wrong Side): Ch 1, work 144 sc evenly spaced across short edge, turn.
Row 4 (Right Side): Ch 2, skip first st, Woven st in next st, *skip next st, Woven st in next st; repeat from * across, turn—72 woven sts.
Rows 5–10: Ch 2, working in spaces between Woven sts, Woven st in space between first and 2nd Woven sts, Woven st in each remaining space across, Woven st in turning ch-2 space, turn.
Row 11 (Shells): Ch 1, working in spaces between Woven sts, *skip next space, (4 tr, ch 3, slip st in 3rd ch from hook, 4 tr) in next space (shell made), skip next space, sc in next space; repeat from * across.
Fasten off.
With Right Side facing, join yarn with slip st in corner of other short edge, to work across opposite side of foundation chain. Repeat Rows 1¬–7 across opposite side of foundation chain and remaining short edge.
Fasten off.
Weave in ends.

Instructions for PILLOW:
-
Front
With larger hook, ch 67.
Row 1 (Right Side): Dc in 4th ch from hook (beginning ch counts as first dc) and in each ch across, turn—65 sts.
Basketweave Pattern
Row 2: Ch 2 (counts as first hdc here and throughout), skip first sc, Fpdc around each of next 3 sts, *Bpdc around each next 3 sts, Fpdc around each of next 3 sts; repeat from * across to last st, hdc in last st, turn.
Row 3: Ch 2, skip first sc, Bpdc around each of next 3 sts, *Fpdc around each next 3 sts, Bpdc around each of next 3 sts; repeat from * across to last st, hdc in last st, turn.
Row 4: Repeat Row 3.
Row 5: Repeat Row 2.
Row 6: Repeat Row 3.
Rows 7–9: Repeat Rows 4–6.
Row 10: Ch 1, sc in each st across, turn.
Front Ridge
Note: Both rows of the front ridge are worked into the sts of the same previous row. The first row (Row 11) is worked into the front loops only. The piece is turned and the next row (Row 12) is worked into the free loops of the same row (the free loops are in the front after the piece is turned).
Row 11 (Right Side): Ch 1, working in front loops only, slip st in each sc across, turn.
Row 12: Ch 1, working in free loops of sts of previous row, sc in each sc across, turn. -
Cable Pattern
Row 13: Ch 1, sc in first sc, *ch 3, skip next 2 sc, sc in next sc, TURN and work sc in each ch of the ch-3 just made, sl st in the next sc (one cable made), TURN; working behind the cable, sc in each of the 2 skipped sc, skip the sc that was made after the ch-3; repeat from * across to last sc, sc in last sc, turn—21 cables.
Note: In the next row, you will work a sc in the first and last st, and 3 sc evenly spaced behind each cable (on Wrong Side). The 3 sc behind each cable are worked into the sc that were worked into the 2 skipped sc. Work sc in one of these skipped sc and 2 sc into the other. Do not work into the sc of the cables. Push the cables towards the Right Side of the throw as you work.
Row 14 (Wrong Side): Ch 1, sc in first sc, *sc in next sc, 2 sc in next sc; repeat from * across to last sc, sc in last sc, turn—65 sc.
Front Ridge
Rows 15 and 16: Repeat Rows 11 and 12. -
Center Basketweave Diamond Pattern
Change to smaller hook.
Rows 17 and 18: Ch 2 (counts as first hdc here and throughout), skip first st, hdc in each st across, turn.
Row 19 (Right Side): Ch 2, skip first st, hdc in next 10 sts, Fpdc around each of next 3 hdc, *hdc in next 17 sts, FPdc around each of next 3 sts; repeat from * across to last 11 sts, hdc in last 11 sts, turn.
Row 20: Ch 2, skip first st, hdc in next 10 sts, Bpdc around each of next 3 sts, *hdc in next 17 sts, Bpdc around each of next 3 sts; repeat from * across to last 11 sts, hdc in last 11 sts, turn.
Row 21: Ch 2, skip first st, hdc in next 7 sts, Fpdc around each of next 3 sts, Bpdc around each of next 3 sts, Fpdc around each of next 3 sts, *hdc in next 11 sts, Fpdc around each of next 3 sts, Bpdc around each of next 3 sts, Fpdc around each of next 3 sts; repeat from * across to last 8 sts, hdc in last 8 sts, turn.
Row 22: Ch 2, skip first st, hdc in next 7 sts, Bpdc around each of next 3 sts, Fpdc around each of next 3 sts, Bpdc around each of next 3 sts, *hdc in next 11 sts, Bpdc around each of next 3 sts, Fpdc around each of next 3 sts, Bpdc around each of next 3 sts; repeat from * across to last 8 sts, hdc in last 8 sts, turn.
Row 23: Ch 2, skip first st, hdc in next 4 sts, [Fpdc around each of next 3 sts, Bpdc around each of next 3 sts] 2 times, Fpdc around each of next 3 sts, *hdc in next 5 sts, [Fpdc around each of next 3 sts, Bpdc around each of next 3 sts] 2 times, Fpdc around each of next 3 sts; repeat from * across to last 5 sts, hdc in last 5 sts, turn.
Row 24: Ch 2, skip first st, hdc in next 4 sts, *[Bpdc around each of next 3 sts, Fpdc around each of next 3 sts] 2 times, Bpdc around each of next 3 sts, hdc in next 5 sts; repeat from * across, turn.
Rows 25 and 26: Repeat Rows 21 and 22.
Rows 27 and 28: Repeat Rows 19 and 20.
Rows 29 and 30: Ch 2, skip first st, hdc in each st across, turn.
Change to larger hook.
Second Set of Front Ridges and Cable Pattern
Rows 31–36: Repeat Rows 11–16. -
Basketweave Pattern
Row 37 (Right Side): Ch 2, skip first sc, Fpdc around each of next 3 sts, *Bpdc around each next 3 sts, Fpdc around each of next 3 sts; repeat from * across to last st, hdc in last st, turn.
Row 38: Ch 2, skip first sc, Bpdc around each of next 3 sts, *Fpdc around each next 3 sts, Bpdc around each of next 3 sts; repeat from * across to last st, hdc in last st, turn.
Row 39: Repeat Row 37.
Rows 40–45: Repeat Rows 37–39 twice.
Row 46: Ch 1, sc in each st across, turn.
Edging (Right Side):
Ch 1, sc in each st across, ch 1 (corner); sc evenly spaced across side edge (take care to work the same number of sc across the side edges of both pillow pieces), ch 1 (corner); sc in each ch across opposite side of foundation ch, ch 1 (corner); sc evenly spaced across side edge, ch 1 (corner); join with sl st in first sc. Fasten off.
Back
Make same as front. -
Finishing
Hold front and back with Wrong Sides together, and sts matching. Working through both thicknesses, join yarn with sl st in any corner, ch 1, knurl st in each st around 3 sides of the pillow, insert the pillow form, and knurl st in each st to close 4th side; join with slip st in beginning ch. Fasten off. Weave in ends.
Abbreviations
- (SPECIAL) Bpdc (back post double crochet)
- Yarn over, insert hook from the back side of the work to front and to back again around the post of the indicated stitch; yarn over and pull up a loop (3 loops on hook), yarn over and draw through two loops (2 loops on hook), yarn over and draw through two loops (1 loop on hook).
- (SPECIAL) Fpdc (Front post double crochet)
- Yarn over, insert hook from the front side of the work to back and to front again around the post of the indicated stitch; yarn over and pull up a loop (3 loops on hook), yarn over and draw through two loops (2 loops on hook), yarn over and draw through two loops (1 loop on hook).
- (SPECIAL) Fptr (Front post treble crochet)
- [Yarn over] twice, insert hook from the front side of the work to back and to front again around the post of the indicated stitch on a previous row; yarn over and pull up a loop (4 loops on hook), [yarn over and draw through 2 loops] 3 times.
- (SPECIAL) knurl st (Knurl stitch) *Also known as reverse single crochet and crab stitch
- Work single crochet in opposite direction by inserting hook in next stitch (to the right if righthanded, and to the left if left-handed), yarn over and draw up a loop, yarn over and draw through both loops on hook.
- (SPECIAL) Woven st
- Yarn over, insert hook in indicated stitch or space, yarn over, pull up a loop (3 loops on hook) and draw this loop through one loop on hook (2 loops on hook), yarn over and draw through both loops on hook (one loop on hook), yarn over (2 loops on hook), insert hook in same stitch or space, yarn over, pull up a loop, and draw this loop through both loops on hook.
Your Recently Viewed Projects
Thanks for your comment. Don't forget to share!
pagebypagereview 3 131199
Oct 28, 2018
You give skeins but not oz can you give how many oz is in the skein you used? Thanks so much
AFCAP Editor
Nov 12, 2018
Hey there! Red Heart "With Love" worsted weight yarn in solid colors is 7oz. per skein. Hope this helps! Thanks for your question! )
EditorLP
Jul 24, 2018
The combination of stitches in this throw and pillow are so pretty. As an advanced beginner, this pattern looks like a good way to try out some new stitches and techniques.
kpgvgirl 0304163
Apr 16, 2018
Does anyone know the number of chains to make this smaller? I'm thinking of a toddler blanket. Any input would be appreciated....this is so lovely.
Cheryl Y
May 07, 2017
I just love the look of this Blueberry Mornings Basket Weave Crochet Afghan Pillow. I like that the written pattern is right here and the pictures for each textured stitch is so clear. The print tab works great, thanks! I'm looking forward to making this one and put my skills to the test. I'll be making mine a little longer and wider to fit a queen size bed by doing the pattern 4 or 5 times per row. Has anyone tried to double the pattern? Thank you so much for sharing this beautiful crochet pattern.
Sherri327
Apr 21, 2016
I would like to make this longer, how many more chains should I add?
pegpina 7572549
Apr 29, 2016
I wanted it longer too so I'm just going to double the chain count. Hope it works.
dynagirl63 0329248
Jun 26, 2016
you can add as many stitches as you like just remember to follow with the pattern from row 4 . You can always undo the extra chains from the beginning .
8987717ne
Oct 21, 2015
My cable doesn't look like this one. Is there a way to contact the designer or find a video on YouTube they may have made? I love the pattern and would like to make it for a Christmas gift. Thanks so much.
Report Inappropriate Comment
Are you sure you would like to report this comment? It will be flagged for our moderators to take action.
Thank you for taking the time to improve the content on our site.