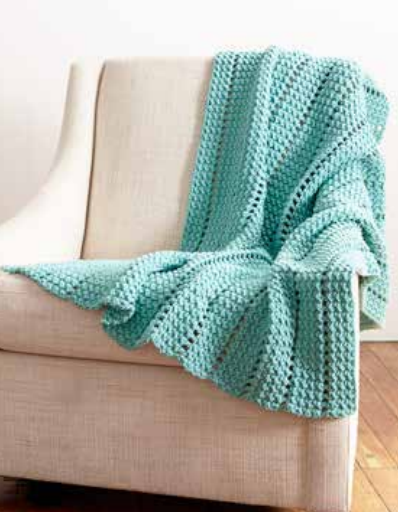
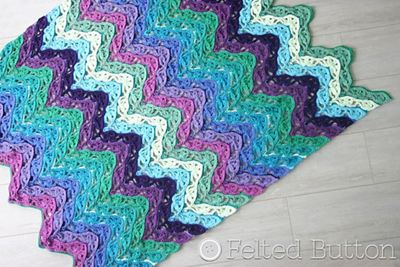
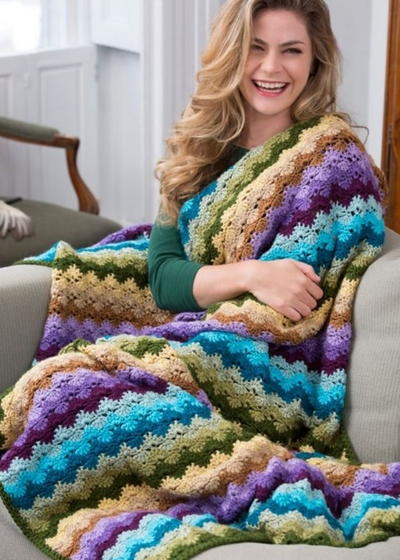
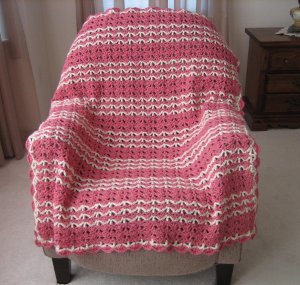
Raspberry Swirls Crochet Throw
If you're a newcomer to the crochet world, then check out this easy crochet blanket. The Raspberry Swirls Crochet Throw is the perfect project for any beginner. Using a combination of open shell stitch, picot stitch, and picot foundation stitch, this blanket creates an effortlessly elegant throw that's perfect for any room in your home. Using a bright color like raspberry will really make it pop. Snuggle up with this beautiful and cozy crochet blanket!


Skill Level: Easy
Throw Measure: 43” x 48”
Materials:
- RED HEART Super Saver: 3 skeins 0774 Light Raspberry, 1 skein 0313 Aran
- Crochet Hook: 5.0 mm (US H-8) crochet hook or size needed for gauge
Gauge: 10 row pattern – 6”
Open Shell, dc – 2”
Special Stitches:
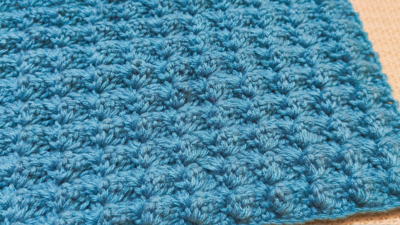
Open Shell – (dc, [ch 1, dc] twice) as indicated.
Foundation picot – sc in next ch, ch 3, sc in next ch.
Picot – (sc, ch 3, sc) as indicated
Note: Throw is crocheted in multiples of 7 plus 8.
Row 1 (RS): With raspberry ch 141, sc in 2nd ch from hook, skip 2 chs, open shell in next ch, [skip 2 chs, foundation picot , skip 2 chs, open shell in next ch] across to last 3 chs, skip 2 chs, sc in last ch, turn.
Row 2: Ch 7, *picot in center dc of open shell, ch 3**, dc in ch space of foundation picot, ch 3, repeat from * across ending last repeat at **, tr in last stitch, turn.
Row 3: Ch 1, sc in first stitch, [open shell in ch space of picot, picot in next dc] across ending with open shell in ch space of last picot, sc in last stitch, turn.
Row 4: Ch 7, *picot in center dc of open shell, ch 3**, dc in ch space of picot, ch 3, repeat from * across ending last repeat at **, tr in last stitch, turn,
Row 5: Repeat Row 3, fasten off and turn.
Row 6: Join aran in first stitch and continue with Row 4, fasten off and turn.
Row 7: Join raspberry in first stitch and continue with Row 3, fasten off and turn.
Row 8: Join aran in first stitch and continue with Row 4, fasten off and turn.
Row 9: Join raspberry in first stitch and continue with Row 3, turn.
Row 10: Join aran in first stitch and continue with Row 4, fasten off and turn.
Color Scheme
Continue with pattern repeating for a total of 75 rows as follows:
(5 rows raspberry, 1 row aran, 1 row raspberry, 1 row aran, 1 row raspberry, 1 row aran) 7 times,
5 rows raspberry, turn on last row.
EDGING
Round 1 (WS): With aran work along top edge 3 dcs in right corner sc, ch 3, *picot in center dc of open shell, ch 3, dc in ch space of picot, ch 3, repeat from * across ending 3 dcs in last corner sc.
Work along side edge [ch 3, picot in space between next 2 rows, ch 3, dc in space between next 2 rows] across ending 3 dcs in bottom corner ch.
Work along bottom edge [ch 3, picot in ch below open shell, ch 3, dc in picot] across ending 3 dcs in last ch.
Work along side edge [ch 3 picot in space between next 2 rows, ch 3, dc in space between next 2 rows] across, join to beginning dc, turn and fasten off.
Round 2 (RS): With raspberry work along top edge [2 dcs, (ch 1, 2 dcs) twice] in center dc of 3 dcs, sc in first ch of ch 3, *[2 dcs, (ch 2, 2 dcs) twice] in ch space of picot, sc in next dc, repeat from * across ending sc in last ch of ch 3, [2 dcs, (ch 2, 2 dcs) twice] in center dc of corner 3 dcs.
Work along side edge sc in first sc of ch 3, continue pattern around entire throw, join to beginning dc and fasten off.
Read NextMoroccan Tile Rainbowghan
Your Recently Viewed Projects
Thanks for your comment. Don't forget to share!
Cheryl Y
Mar 04, 2017
I like the look of this Raspberry Swiris Crochet Throw. The textures look so different then any other pattern I have seen. Just what I like, different! I do wonder why the picot is called the Foundation picot when it isn't the foundation? Other then that, this pattern looks really interesting and is well written and easy to follow. I'm looking forward to making this one and hoping that if it comes out I'll make a larger one In different colors. Thank you so much for sharing this free crochet pattern.
RemerRanch 9347962
Mar 05, 2015
I agree, insufficient instructions... so here's what I came up with. I believe it's the missing info. the OPEN SHELL is dc, ch 1, dc, ch 1, dc all in the same stitch or chain. Picot is sc, ch 3, sc all in the same stitch. Her foundation picot simply means you are crocheting the picot in the foundation chain. After that it is crocheted in the previous row's stitch. I came up with it yesterday, and it looks identical to the picture she has. So there you have it! Enjoy making this beautiful afghan.'
pcarnahan 5504372
Jul 15, 2014
Need better instructions. Is open shell (dc, ch2, dc)? What is a foundation picot and is the picot ch 3 and slip stitch in the same place?
lakeladypatti 7313 187
Jun 27, 2014
There are no instructions for the "open shell" stitch, and I have no clue what this is. Too bad, it's a lovely pattern but how can I make it without complete directions?
Report Inappropriate Comment
Are you sure you would like to report this comment? It will be flagged for our moderators to take action.
Thank you for taking the time to improve the content on our site.