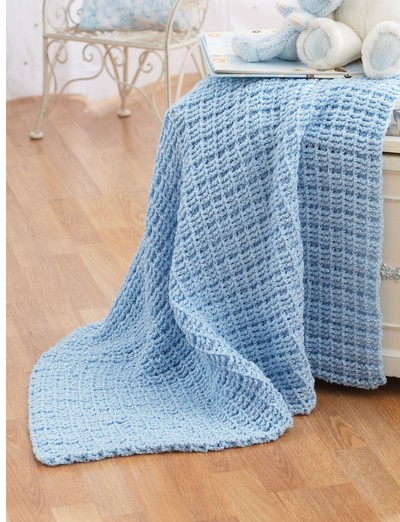
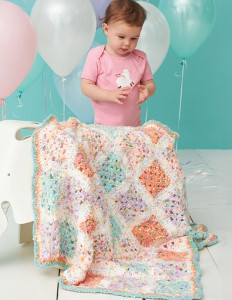
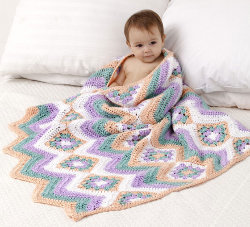
Granny Stripes Baby Blanket
If you're in need of some new baby crochet patterns, this Granny Stripes Baby Blanket is perfect. Babies will love how soft this Simply Soft Caron yarn is. Plus, the pastel colors used will look great in any baby's room!

Crochet HookH/8 or 5 mm hook
Yarn Weight(4) Medium Weight/Worsted Weight and Aran (16-20 stitches to 4 inches)
MEASUREMENTS
Finished Measurements approximately 35"/89cm wide x 46"/117cm long.
MATERIALS
Simply Soft (170 g/6. oz;288 m/315 yds)
- Contrast A White (9701) 1
- Contrast B Orchid (9717) 1
- Contrast C Light Country Peach (9737) 2
- Contrast D () 2
Crochet hook Size H8/5mm
Yarn needle
Diagram
GAUGE
One granny square = 4 1/2 x 4 1/2"/11.5 x 11.5cm;
In ripple pattern, 1 ripple = 6 1/2"/16.5cm.
Gauge is not critical for this project.
INSTRUCTIONS
NOTES
1. Granny squares and half granny squares are worked with RS facing throughout. Do not turn work at the ends of rounds or rows.
2. Five granny squares and one half granny square are joined together to make each strip. A "join-as-you-go" technique is used to join the current square to the previous square. When working Round/Row 4, the current square is joined to the previous square by working a slip stitch in the corresponding corner ch-1 space of the previous square.
3. A ripple stitch pattern is worked across one edge of each granny square strip, then the strips are sewn together, and the ripple stitch pattern worked across the remaining unworked edge.
GRANNY SQUARE STRIP #1 (make 2)
First Granny Square
With A, ch 4; join with sl st in first ch to form a ring.
Round 1 (RS): Ch 3 (counts as dc here and throughout), 2 dc in ring, [ch 1, 3 dc in ring] 3 times, ch 1; join with sl st in top of beginning ch—12 dc and 4 ch-1 sps. Fasten off A.
Round 2: With RS facing, join B with sl st in any ch-1 sp, ch 3, (2 dc, ch 1, 3 dc) in same ch-1 sp, *ch 1, (3 dc, ch 1, 3 dc) in next ch-1 sp (corner made); repeat from * 2 more times, ch 1; join with sl st in top of beginning ch—4 corners and 1 ch-1 sp one each side between corners. Fasten off B.
Round 3: With RS facing, join D with sl st in any corner ch-1 sp, ch 3, (2 dc, ch 1, 3 dc) in same ch-1 sp, ch 1, 3 dc in next ch-1 sp, ch 1, *(3 dc, ch 1, 3 dc) in next corner ch-1 sp, ch 1, 3 dc in next ch-1 sp; repeat from * 2 more times; ch 1, join with sl st in top of beginning ch—4 corners, and one 3-dc group and 2 ch-1 sps on each side between corners. Fasten off D.
Round 4: With RS facing, join C with sl st in any corner ch-1 sp, ch 3, (2 dc, ch 1, 3 dc) in same ch-1 sp, 3 dc in next 2 ch-1 sps, *(3 dc, ch 1, 3 dc) in next corner ch-1 sp, 3 dc in next 2 ch-1 sps; repeat from * 2 more times; join with sl st in top of beginning ch—4 corners, and one 3-dc group and 2 ch-1 sps on each side between corners. Fasten off C.
Next Granny Square (make and join 4)
Work same as first granny square through Round 3.
Round 4 (joining round): Join C with sl st in any corner ch-1 sp, ch 3, (2 dc, ch 1, 3 dc) in same ch-1 sp, 3 dc in next 2 ch-1 sps, *(3 dc, ch 1, 3 dc) in next corner ch-1 sp, 3 dc in next 2 ch-1 sps; repeat from * once more, 3 dc in next corner ch-1 sp, hold WS of this square and previous square together, sl st in corresponding corner ch-1 sp of previous square, ch 1, 3 dc in same corner ch-1 sp of this square, 3 dc in next 2 ch-1 sps; join with sl st in top of beginning ch—4 corners, and one 3-dc group and 2 ch-1 sps on each side between corners. Fasten off C.
Make and join three more granny squares in this manner, making a strip of five granny squares long.
Half Granny Square (make and join 1)
With A, ch 4; join with sl st in first ch to form a ring.
Row 1 (RS): Ch 4 (counts as dc, ch 1 here and throughout), (3 dc, ch 1, 3 dc) in ring (corner made), ch 1, dc in ring; do not join—1 corner, and 1 ch-1 sp and 1 dc on each side of corner. Fasten off A.
Row 2: With RS facing, join B with sl st in 3rd ch of beginning ch-4, ch 4, 3 dc in beginning ch-sp, ch 1, (3 dc, ch 1, 3 dc) in next ch-1 sp, ch 1, 3 dc in last ch-1 sp, ch 1, dc in last dc—1 corner, and 2 ch-1 sps, one 3-dc group, and one dc on each side of corner. Fasten off B.
Row 3: With RS facing, join D with sl st in 3rd ch of beginning ch-4, ch 4, 3 dc in beginning ch-sp, ch 1, 3 dc in next ch-1 sp, ch 1, (3 dc, ch 1, 3 dc) in next ch-1 sp, [ch 1, 3 dc in next ch-1 sp] twice, ch 1, dc in last dc—1 corner, and 3 ch-1 sps, two 3-dc groups, and one dc on each side of corner. Fasten off D.
Row 4: With RS facing, join C with sl st in 3rd ch of beginning ch-4, ch 3, 3 dc in each ch-1 sp to corner ch-1 sp, 3 dc in corner ch-1 sp, hold WS of this half square and last square of strip together, sl st in corresponding corner ch-1 sp of last square of strip, ch 1, 3 dc in same corner ch-1 sp of this half square, 3 dc in each ch-1 sp across, dc in last dc—1 corner, and three 3-dc groups and one dc on each side of corner. Fasten off C.
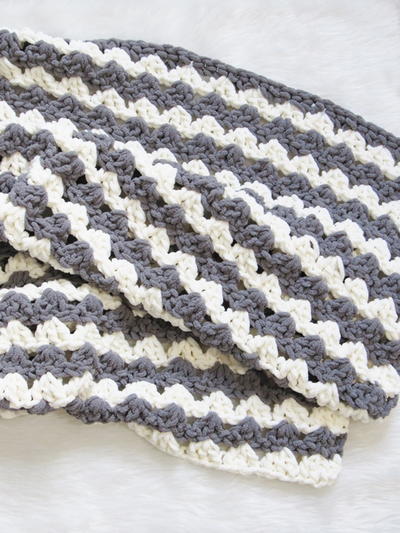
Ripple Pattern #1
With RS one granny square strip #1 facing, join A with sl st in corner ch-1 sp beginning of first full granny square, to work across top of strip from first full granny square across to half granny square.
Row 1 (RS): Ch 3, dc2tog over next 2 dc, *dc in next 10 dc, 5 dc in next ch-1 sp ("peak"), dc in next 10 dc, dc5tog over next 5 sts ("valley" - the next 5 sts will be 2 dc, the join between 2 squares, and the next 2 dc); repeat from * across to last 10 dc, dc in last 10 dc, turn.
Row 2: Ch 3, 3 dc in first dc, dc in next 7 dc, *dc5tog over next 5 dc, dc in next 10 dc, 5 dc in next dc, dc in next 10 dc; repeat from * across to last 4 sts, dc3tog over next 3 sts, dc in top of turning ch, turn. Fasten off A.
Row 3: With RS facing, join B with sl st in first dc, ch 3, dc3tog over next 3 dc, *dc in next 10 dc, 5 dc in next ch-1 sp, dc in next 10 dc, dc5tog over next 5 sts; repeat from * across to last 9 sts, dc in next 7 dc, 2 dc in next dc, dc in top of turning ch, turn.
Row 4: With B, repeat Row 2. Fasten off B.
Rows 5 and 6: With D, repeat Rows 3 and 4. Fasten off D.
Rows 7 and 8: With C, repeat Rows 3 and 4. Fasten off C.
GRANNY SQUARE STRIP #2 (make 2)
Make each strip the same as granny square strip #1, using the following color sequence: C, D, B, A, then work ripple pattern #2 across one edge of the strip.
Ripple Pattern #2 (work across top of each granny square strip #2)
With RS one granny square strip #2 facing, join C with sl st in first dc at top of half granny square, to work across top of strip from half granny square across to last full granny square.
Row 1 (RS): Ch 3, dc in next 10 dc, *dc5tog over next 5 sts ("valley" – the next 5 sts will be 2 dc, join between squares, and next 2 dc), dc in next 10 dc, 5 dc in next ch-1 sp ("peak"), dc in next 10 dc; repeat from * across to last 2 dc, dc2tog over last 2 dc, dc in last ch-1 sp, turn.
Row 2: Ch 3, dc3tog over next 3 dc, *dc in next 10 dc, 5 dc in next ch-1 sp, dc in next 10 dc, dc5tog over next 5 sts; repeat from * across to last 9 sts, dc in next 7 dc, 2 dc in next dc, dc in top of turning ch, turn. Fasten off C.
Row 3: With RS facing, join D with sl st in first dc, ch 3, 3 dc in same dc, dc in next 7 dc, *dc5tog over next 5 dc, dc in next 10 dc, 5 dc in next dc, dc in next 10 dc; repeat from * across to last 4 sts, dc3tog over next 3 sts, dc in top of turning ch, turn.
Row 4: With D, repeat Row 2. Fasten off D.
Rows 5 and 6: With B, repeat Rows 3 and 4. Fasten off B.
Rows 7 and 8: With A, repeat Rows 3 and 4. Fasten off A.
Repeat this ripple pattern across the other granny square strip #2.
FINISHING
Arrange granny square strips, one on top of the other and with ripple section at top, in the following order: strip #2, strip #1, strip #2, strip #1. Sew stripe together. Work ripple pattern #1 across unworked edge of first strip #2, for a total of 10 rows, in the following color sequence: C, D, B, A, C.
Edging
Row 1 (RS): With RS facing, join C with sc at beginning of one long edge, sc evenly spaced across long edge (work 2 sc in the end of each row), turn.
Row 2: Ch 1, sc in each sc across. Fasten off C.
Repeat across other long edge.
Using yarn needle weave in all ends.
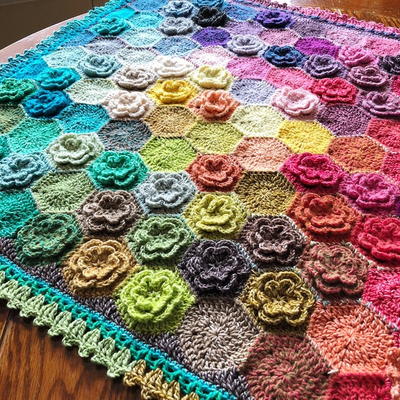
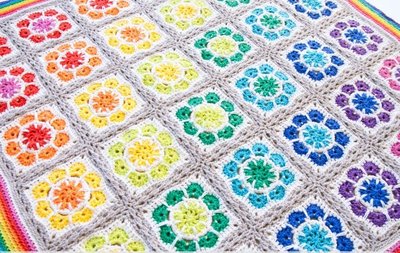
Read NextMagic Rainbow Crochet Baby Blanket
Your Recently Viewed Projects
Thanks for your comment. Don't forget to share!
rechcygl4 4648469
Dec 09, 2014
Hi - I just found out that my son and his wife are having a little boy and I'm anxious to make this Granny Stripes Baby Blanket for him -) I want to buy the yarn but you have no color listed for Contrast Color D...I believe it's the green. I love the colors shown and would like to know what was used for D. Thanks!
Report Inappropriate Comment
Are you sure you would like to report this comment? It will be flagged for our moderators to take action.
Thank you for taking the time to improve the content on our site.